Vidds makes it easy to create GIFs from your videos, and does it all in your web browser. You can clip the video, crop out unimportant parts, and resize it. You can even animate text over it!
Vidds is easy to use, powerful, and works 100% online, which makes it great for creating the perfect GIF clip from your videos.
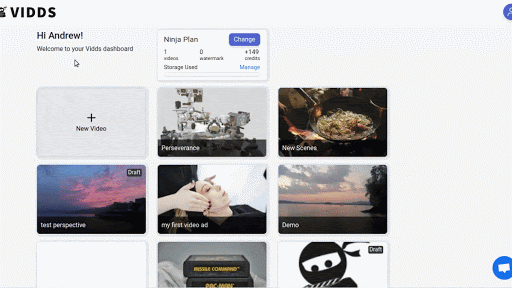
In this post we’ll guide you through how to create gifs from videos and clips.
GIF is an animation format (Graphics Interchange Format) that’s been around on the web since 1989 – over 30 years! That explains its popularity and support. Compared to common video formats, it’s larger in size, which is why GIFs are often low quality or low frame rate. It also does not support audio.
Considering how large GIFs are, it seems odd that they’re so popular online, but they do have their uses.
Because the format is so old, it’s very popular and works almost everywhere for sharing short clips and funny memes. Most social media sites — Facebook, Twitter, Reddit, and more — allow sharing GIFs easily.
Also, while videos generally don’t work in e-mail clients like GMail, you can add GIFs.
Last, because it loops and always plays in browsers, it’s great for quick clips on landing pages or other website content like blog posts.
We don’t recommend GIFs for all use cases, but it’s definitely a great format for sharing small bits. You can see them in action throughout this page – all of the usage videos below and the example are GIFs!
There are some general practices you should follow when creating GIFs, mostly due to the size of files generated.
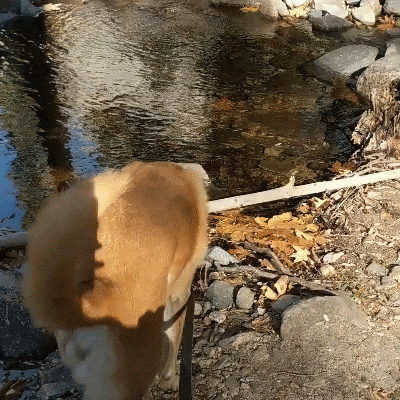
Let’s get started creating a gif. I have a video of my dog playing in a river, and I want to make a clip of a funny part where he dips his paws into water that’s deeper than he expected 🙂
Once you’ve done this, the process is so easy, you can knock them out in minutes!
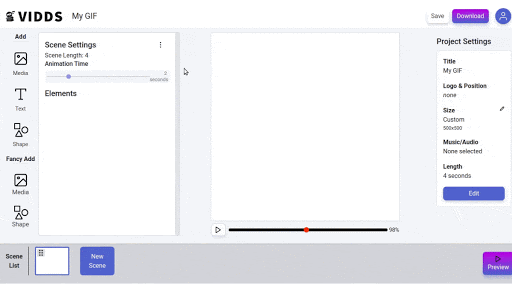
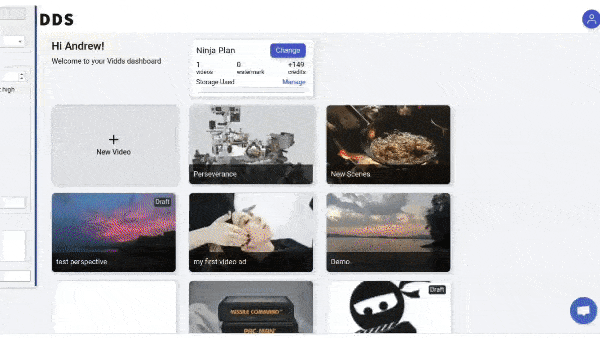
Start by creating a new video on your dashboard. Enter a title, then select Custom for the size to enter a small-ish size (you can resize it later to fit the content better). Last, I chose “Create Your Own” scene since I’ll be embedding my own video and don’t need a design.
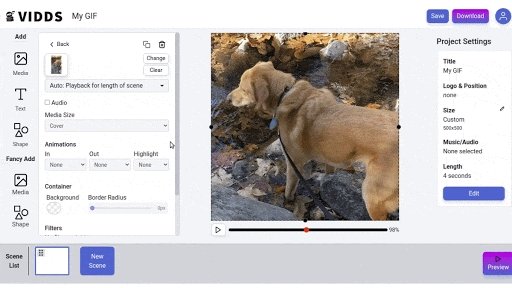
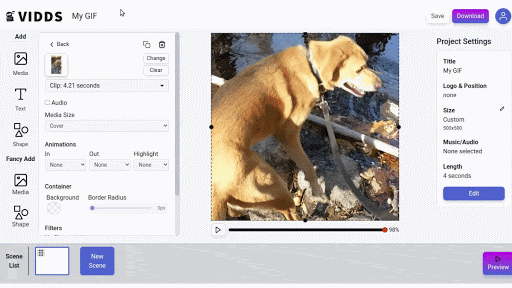
Next, we’ll embed the video into our scene. First, click the Add Media button and then Choose Media button. You can upload your video now or select an existing video you’ve already uploaded.
Last, select the element and resize it to cover the entire video.
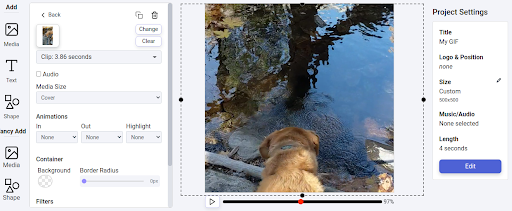
Next, you can optionally clip the video to just a small section you want to play back.
With the video selected, you’ll notice a dropdown in the settings that says “Auto: Playback for length of scene.” Click that, and select “Custom Clip and Speed.” That will bring up the clip dialog, where you can drag the start (blue line) and end (red line) to adjust to a specific clip.
Once you’ve clipped it, you can also increase the playback speed if you’d like it to play back faster.
Once you’re done, just click the “Clip” button to apply your changes.
If necessary, you can resize the element so it’s larger than the video. This allows you to crop the content to just the part you want.
I meant for this to be a quick, straight-forward post, but sometimes, you just want some funny text in your GIFs. With Vidds, you can add text anywhere, choose how you want it to animate, and style it.
Just click the Add Text button on the left, type in your text, and choose the font. There are plenty of other styles you can use, like background color, shadows, and more.
Under the Animations section, you can select the animation in, out, and a highlight. We have a lot of animations to try out, like Up/Down/Left/Right, Fade, Scale, and Skew. Play around and see what looks good.
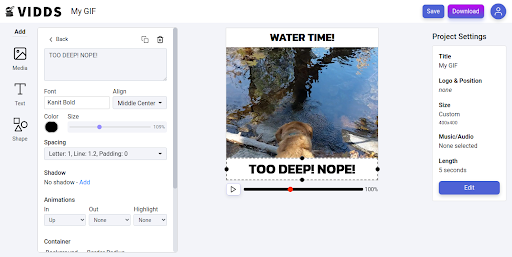
Click the playback button (or the preview button in the bottom right) to watch your clip. Make sure it’s playing back what you want.
If everything looks good, click the Download button to get the video.
Make sure to click the “Switch to GIF” option in the Format section so Vidds generates a GIF instead of an mp4.
You now know how to create GIFs from your videos and clips that you can upload to social media, embed in an e-mail, add to a web page, or share any way you’d like!
Here are the results from this process. The one on the left is just the video clip converted to a GIF, while the second has some text animated on top.

© copyright vidds.co 2023 – made with ♡ from San Diego & Stockholm
| Cookie | Duration | Description |
|---|---|---|
| cookielawinfo-checbox-analytics | 11 months | This cookie is set by GDPR Cookie Consent plugin. The cookie is used to store the user consent for the cookies in the category "Analytics". |
| cookielawinfo-checbox-functional | 11 months | The cookie is set by GDPR cookie consent to record the user consent for the cookies in the category "Functional". |
| cookielawinfo-checbox-others | 11 months | This cookie is set by GDPR Cookie Consent plugin. The cookie is used to store the user consent for the cookies in the category "Other. |
| cookielawinfo-checkbox-necessary | 11 months | This cookie is set by GDPR Cookie Consent plugin. The cookies is used to store the user consent for the cookies in the category "Necessary". |
| cookielawinfo-checkbox-performance | 11 months | This cookie is set by GDPR Cookie Consent plugin. The cookie is used to store the user consent for the cookies in the category "Performance". |
| viewed_cookie_policy | 11 months | The cookie is set by the GDPR Cookie Consent plugin and is used to store whether or not user has consented to the use of cookies. It does not store any personal data. |