Categories
Blog

Free Tools – Video Screenshot

Free Video Editing Tools - Video Screenshot

Free Video Screenshot Tool

This is part 6 of our series on free Vidds tools.

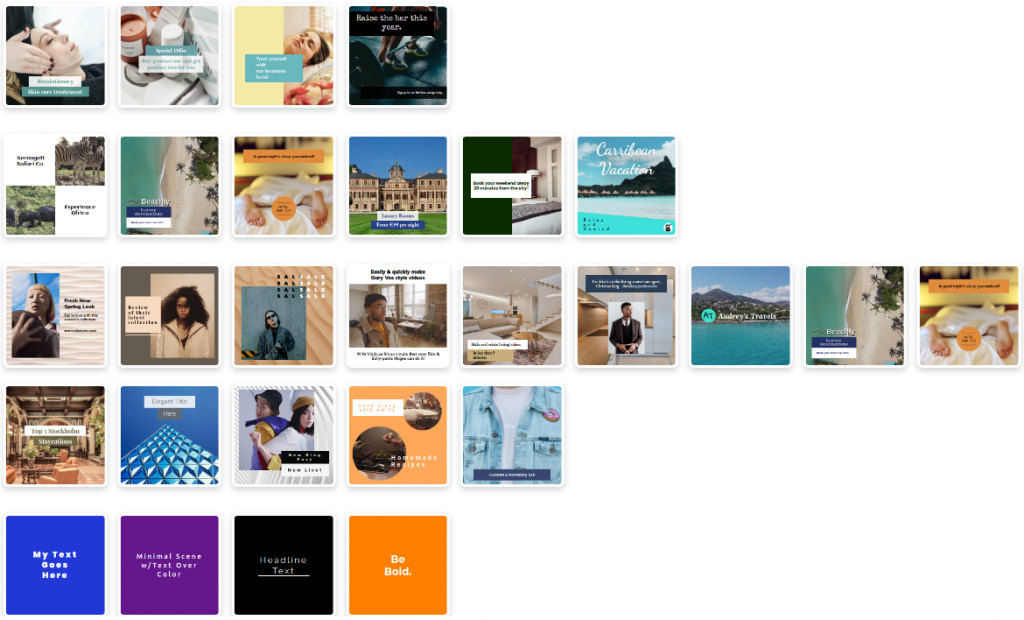
The goal of Vidds is to create shareable videos easily, but we’ve also created free tools that handle basic video editing tasks without requiring an account signup.

Today we’re talking about our free tool to extract frames from videos.

This tool is quick and painless!

  1. Open the online video screenshot tool.
  2. Drag and drop your video, or click the red box to select a file from your computer.
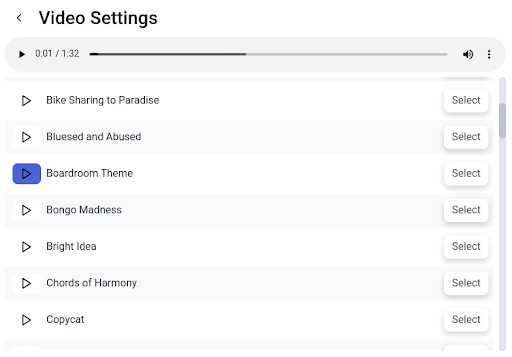
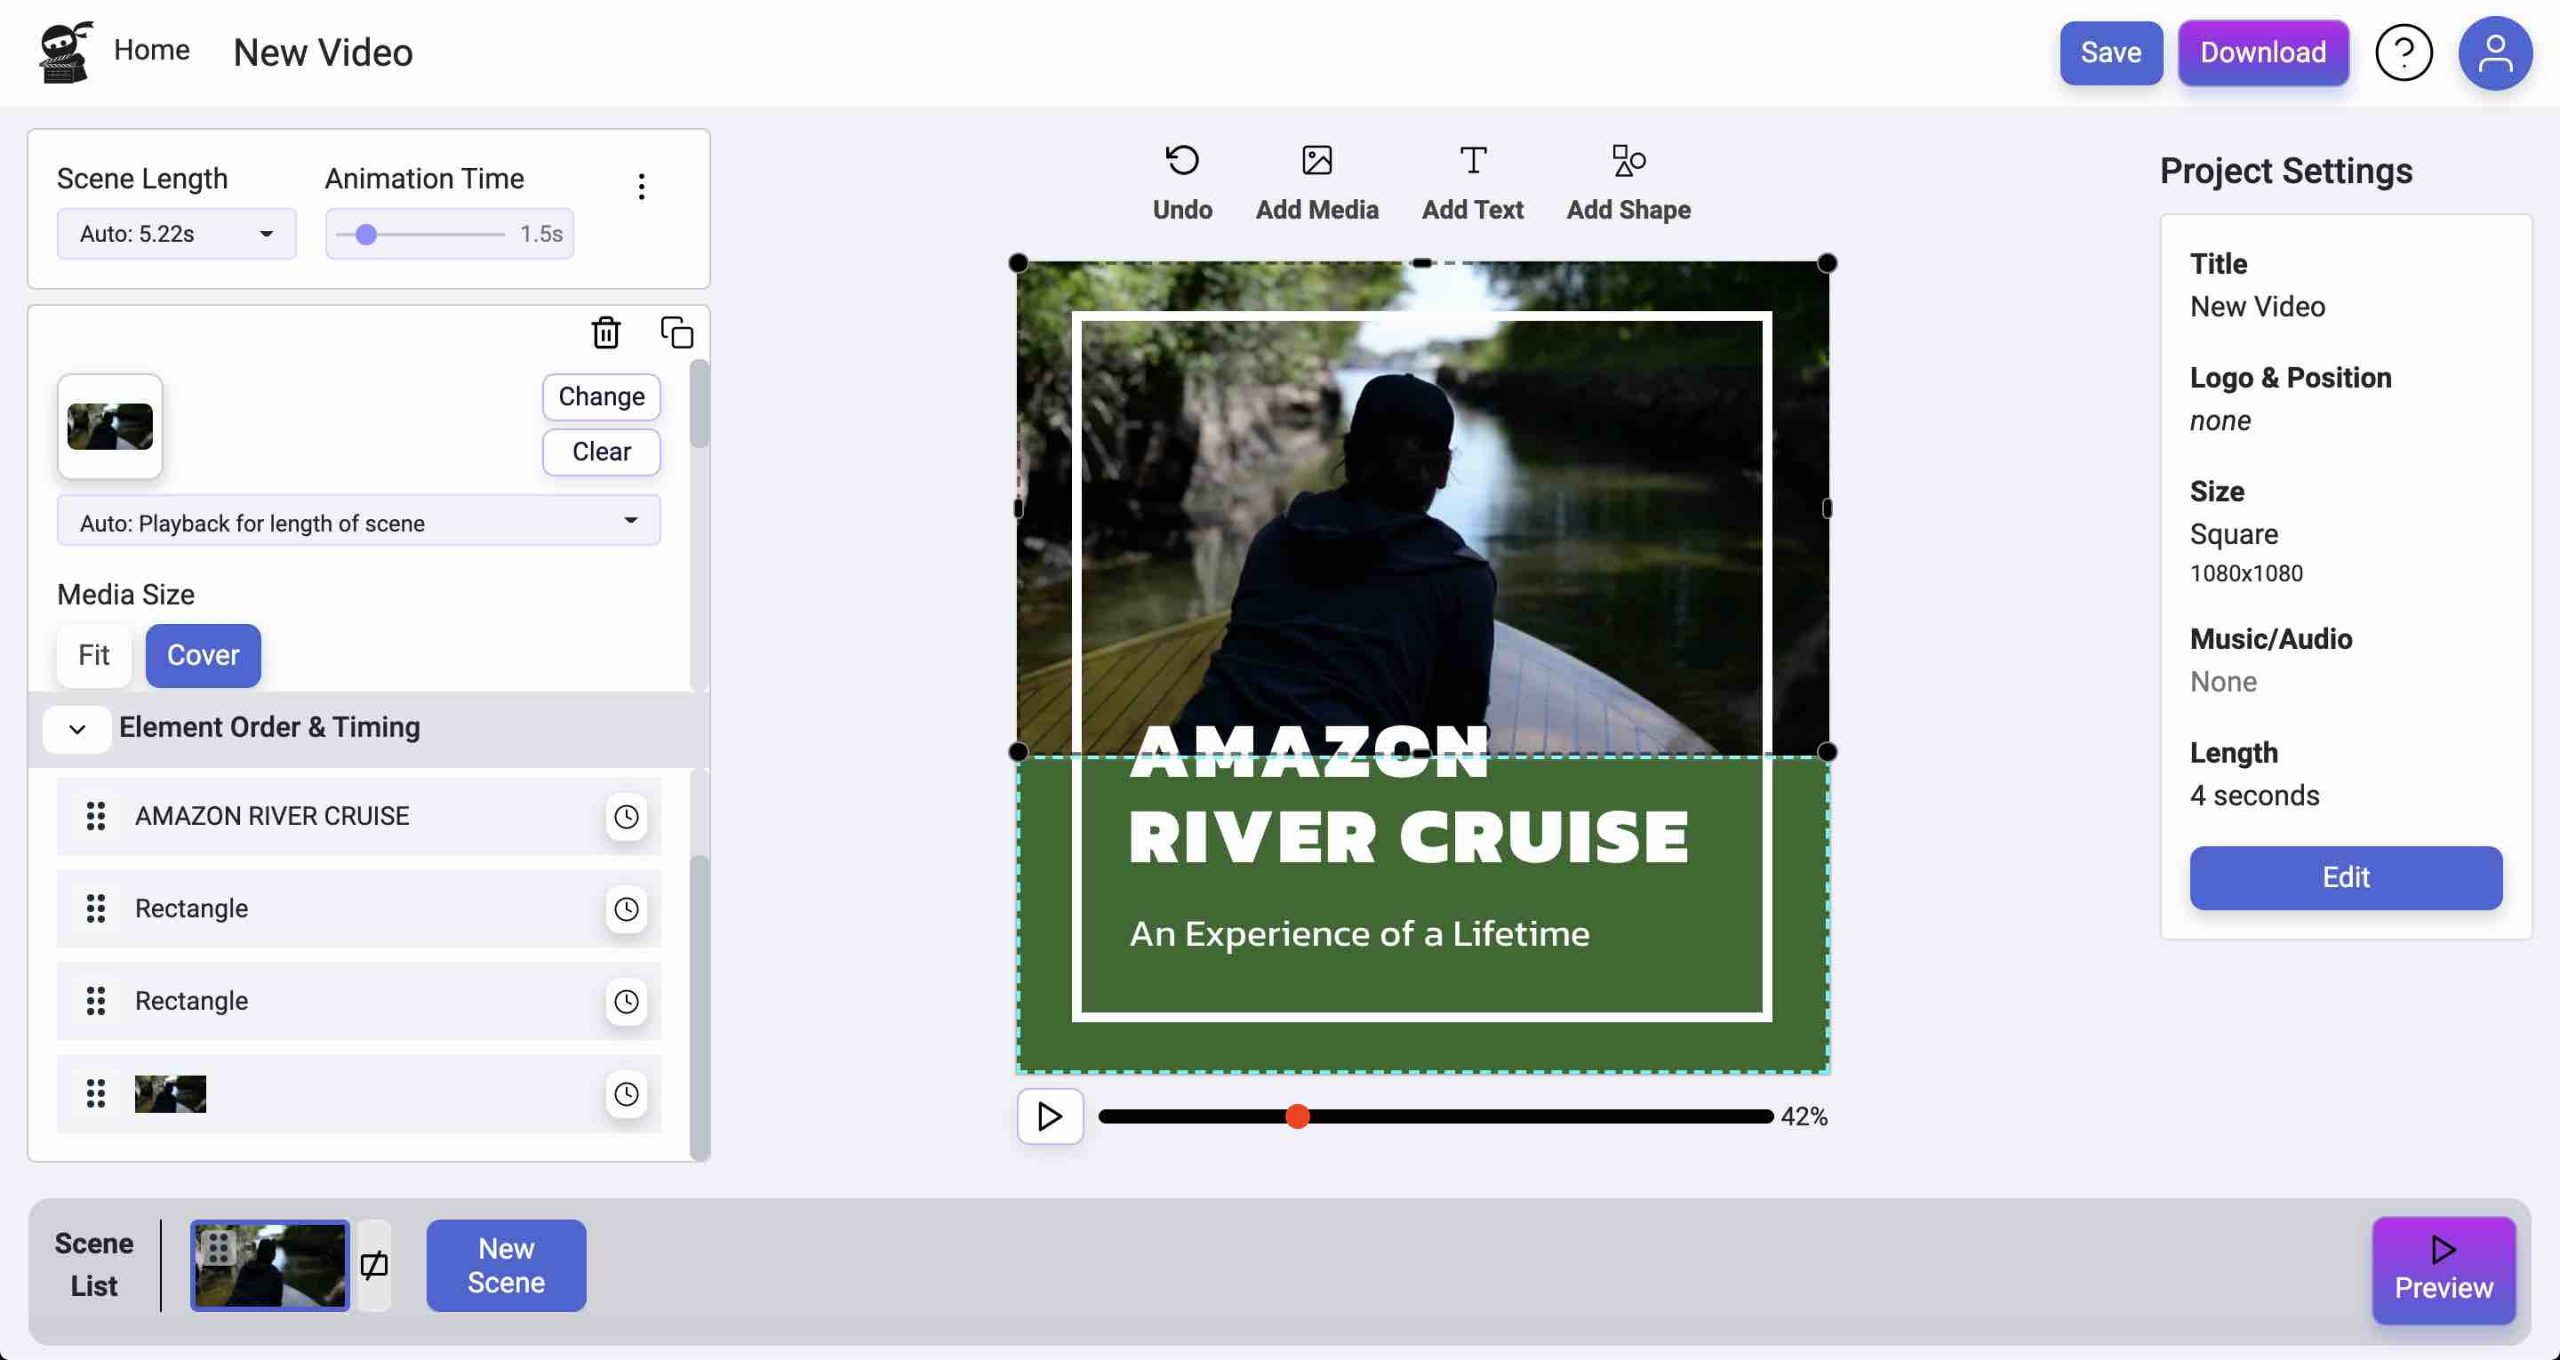
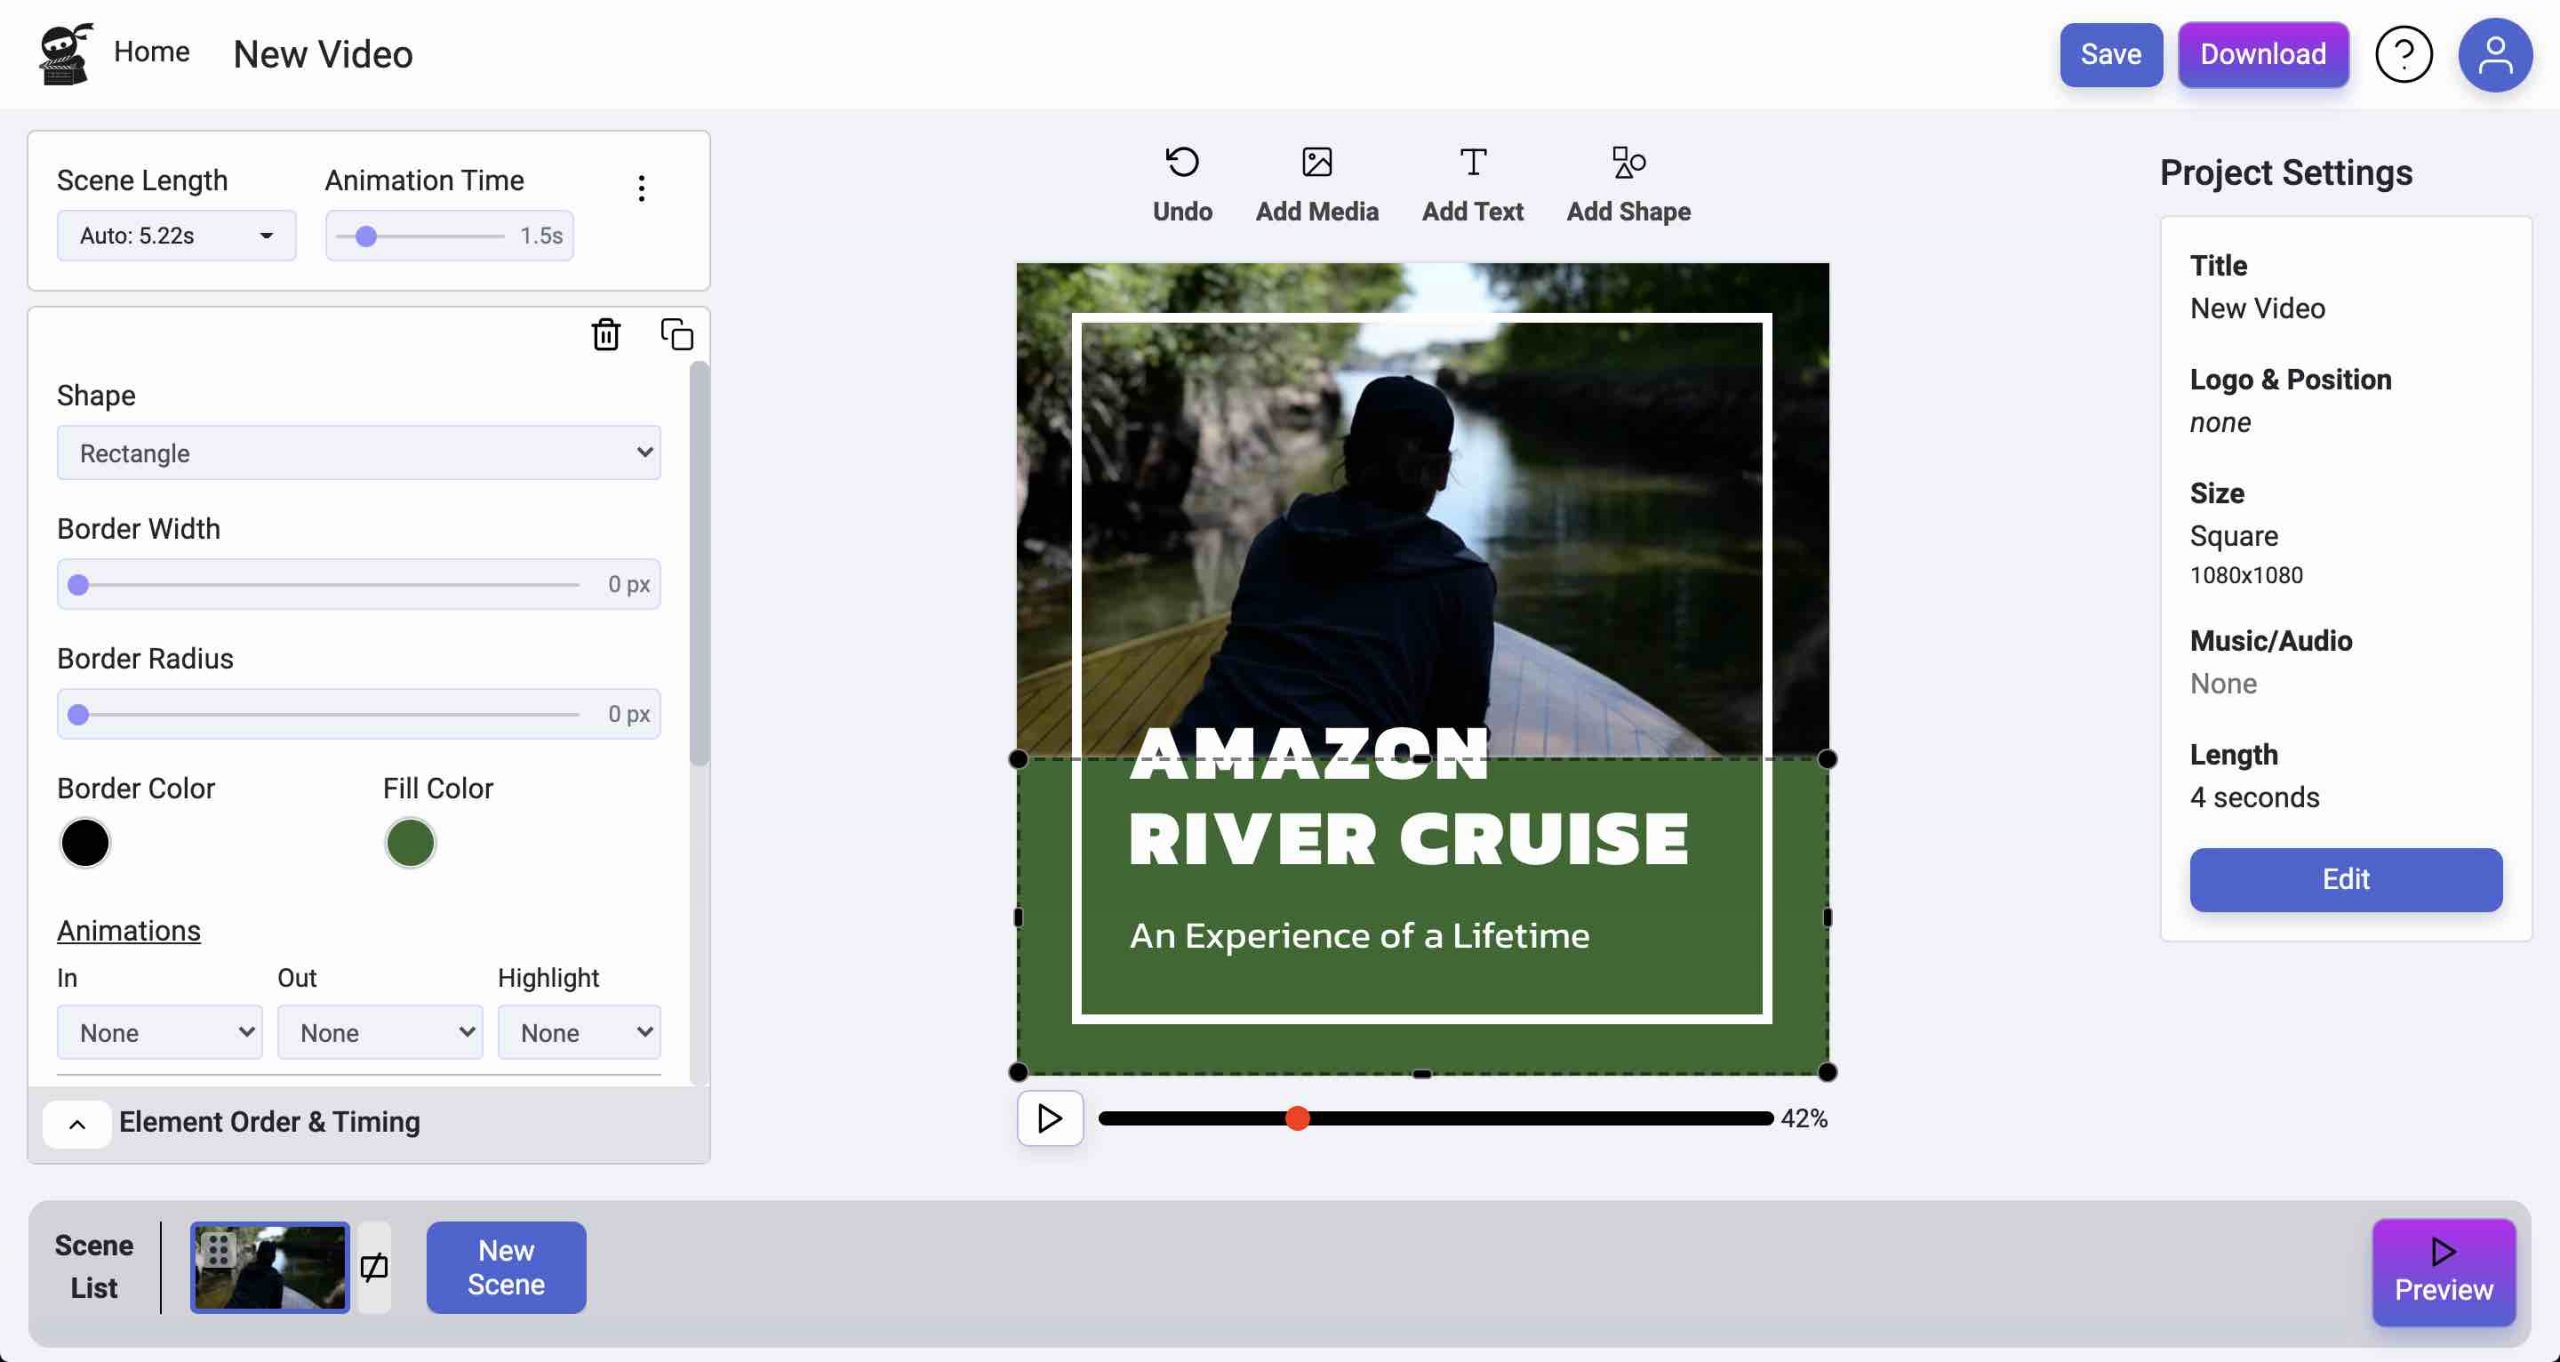
  3. Now, just drag the seek slider below the video to look for the part you want to screenshot.
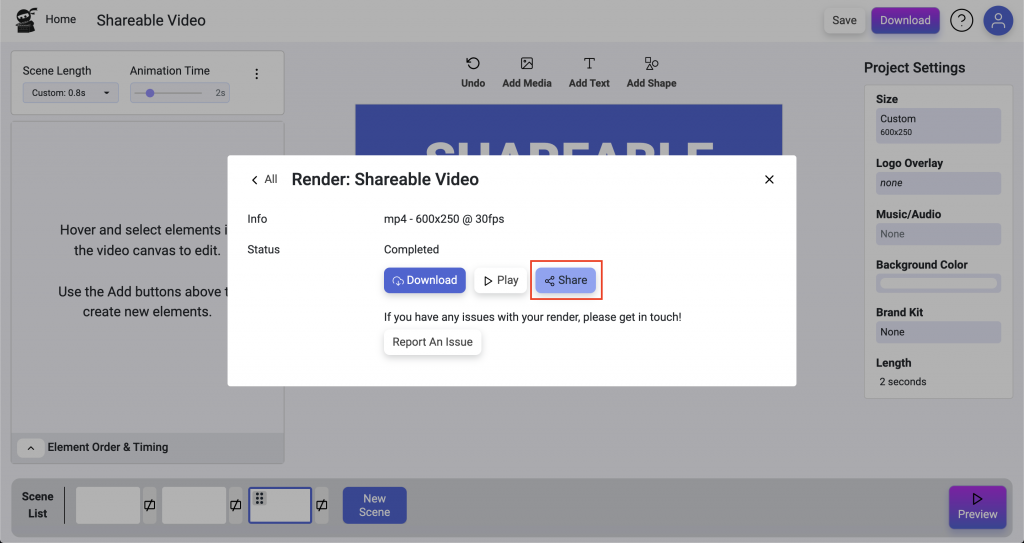
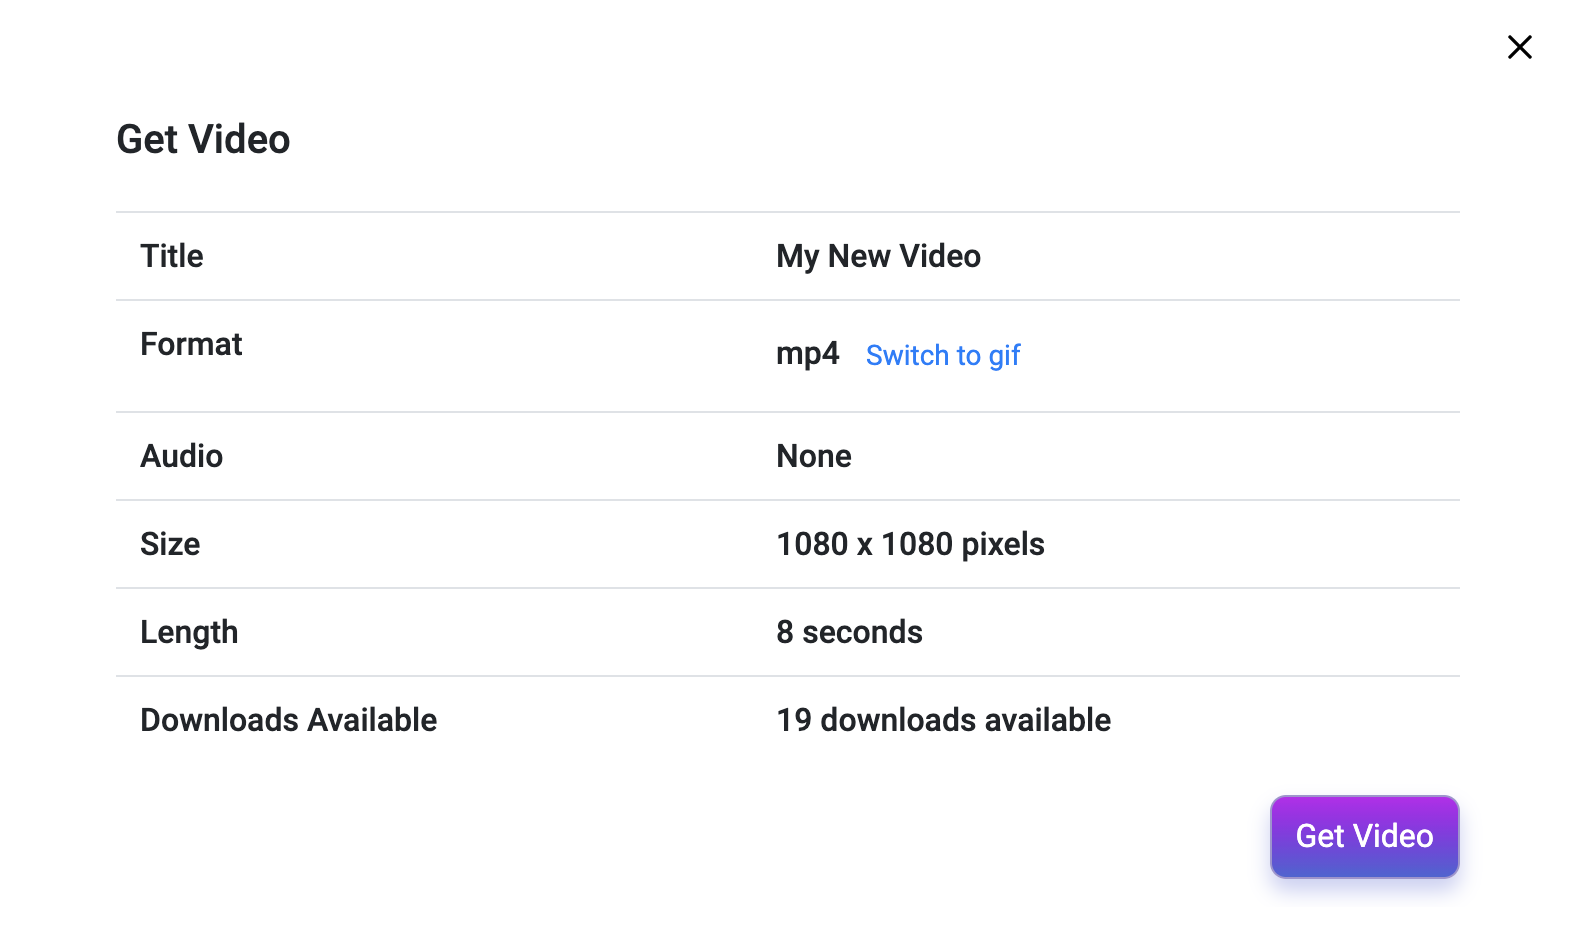
  4. Click Save. Really, that’s it!
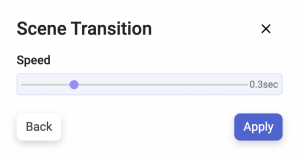
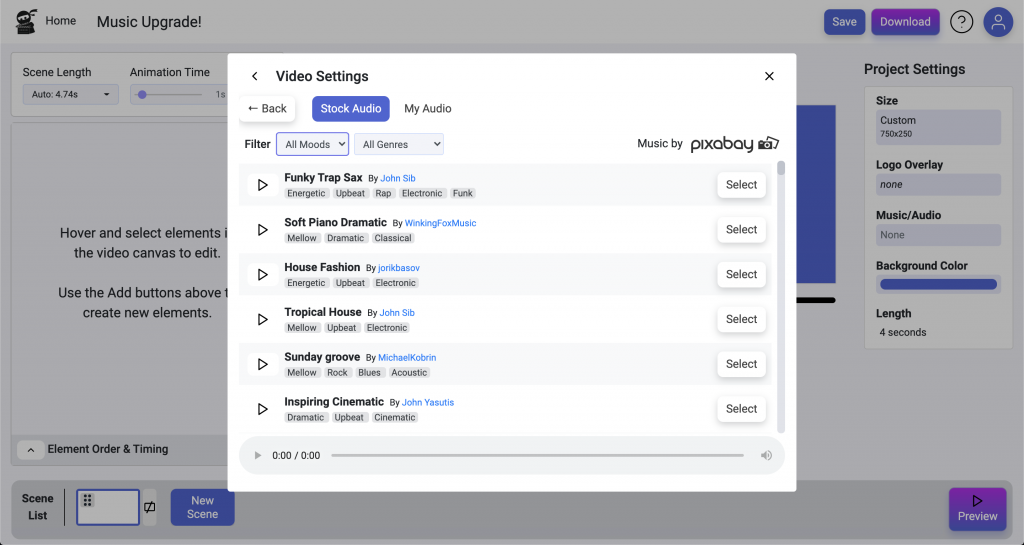
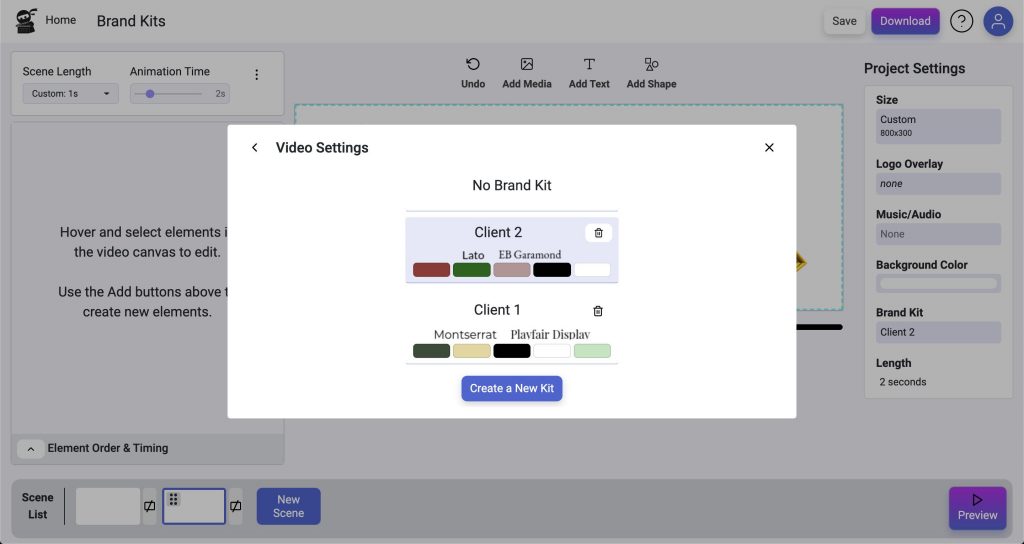
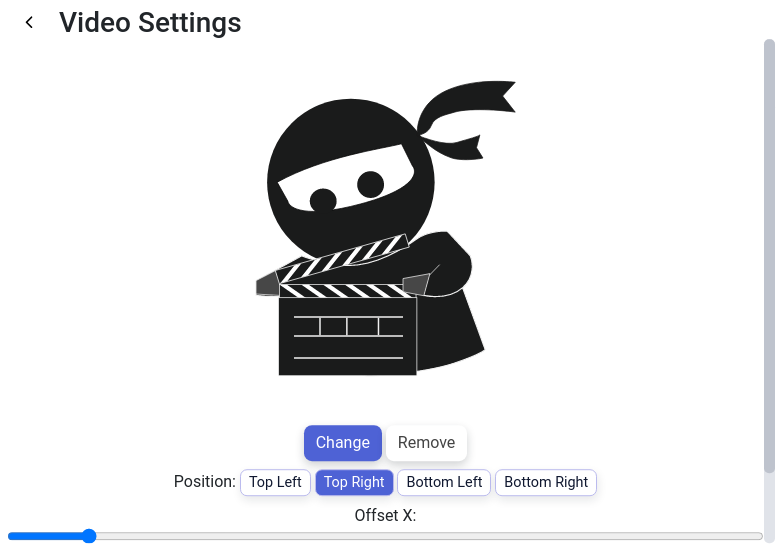
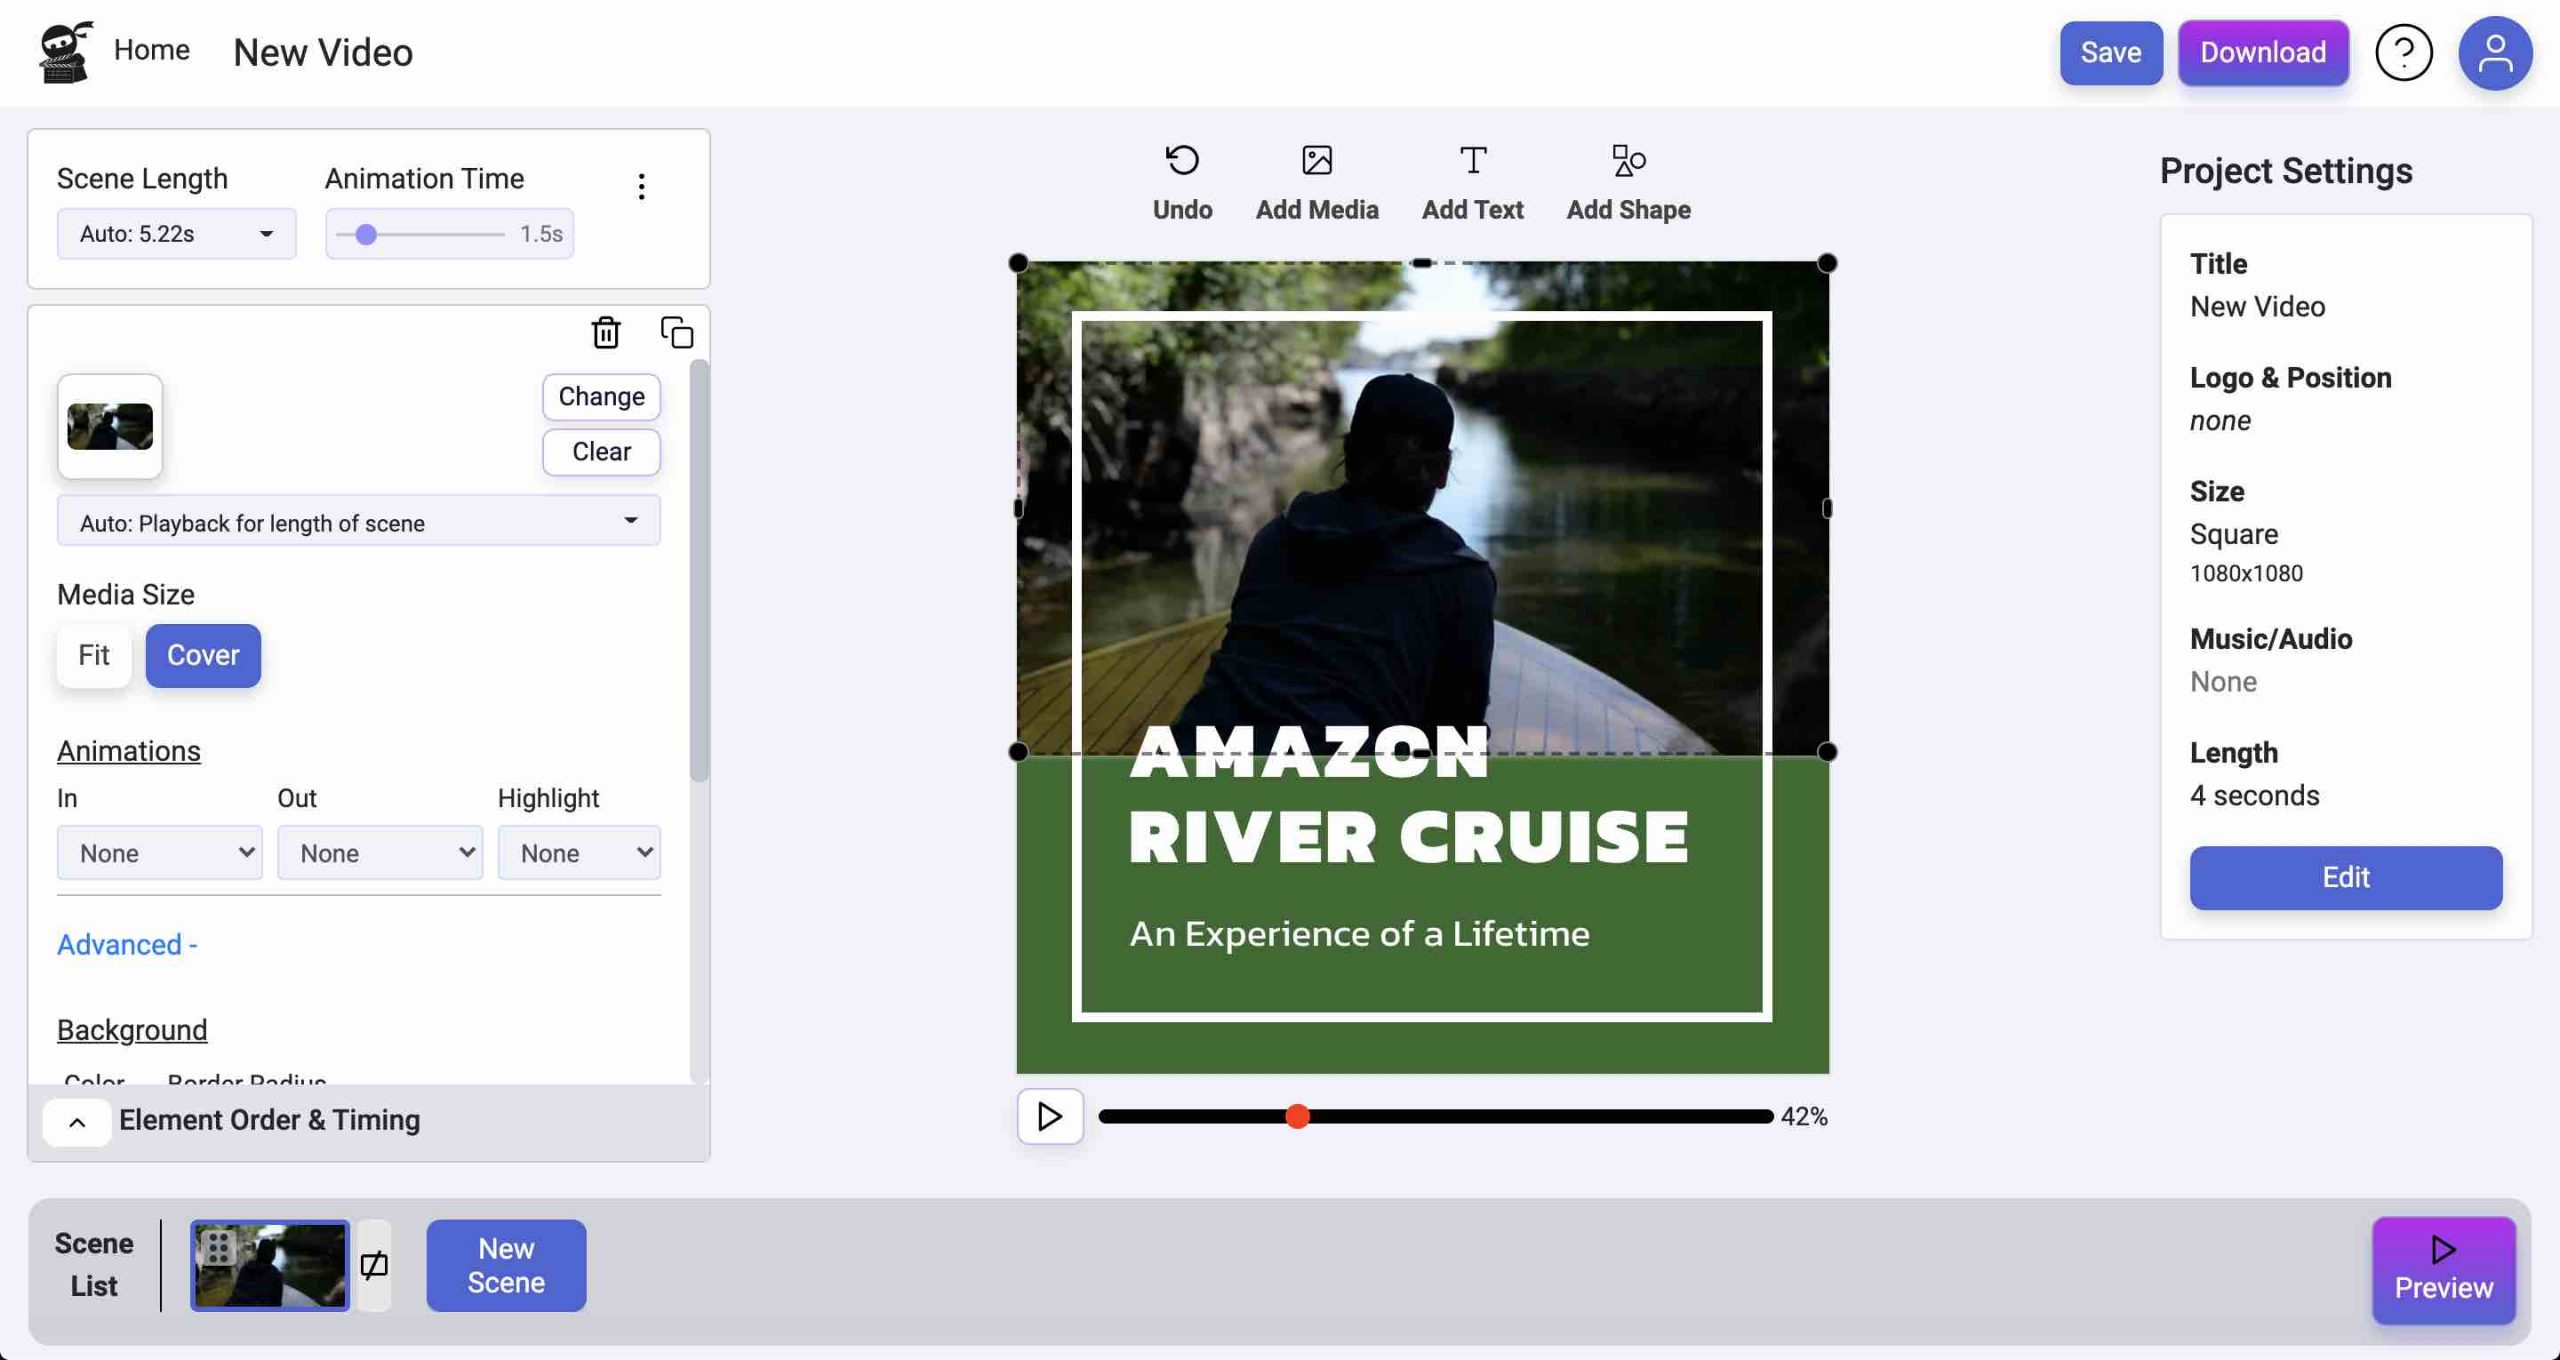
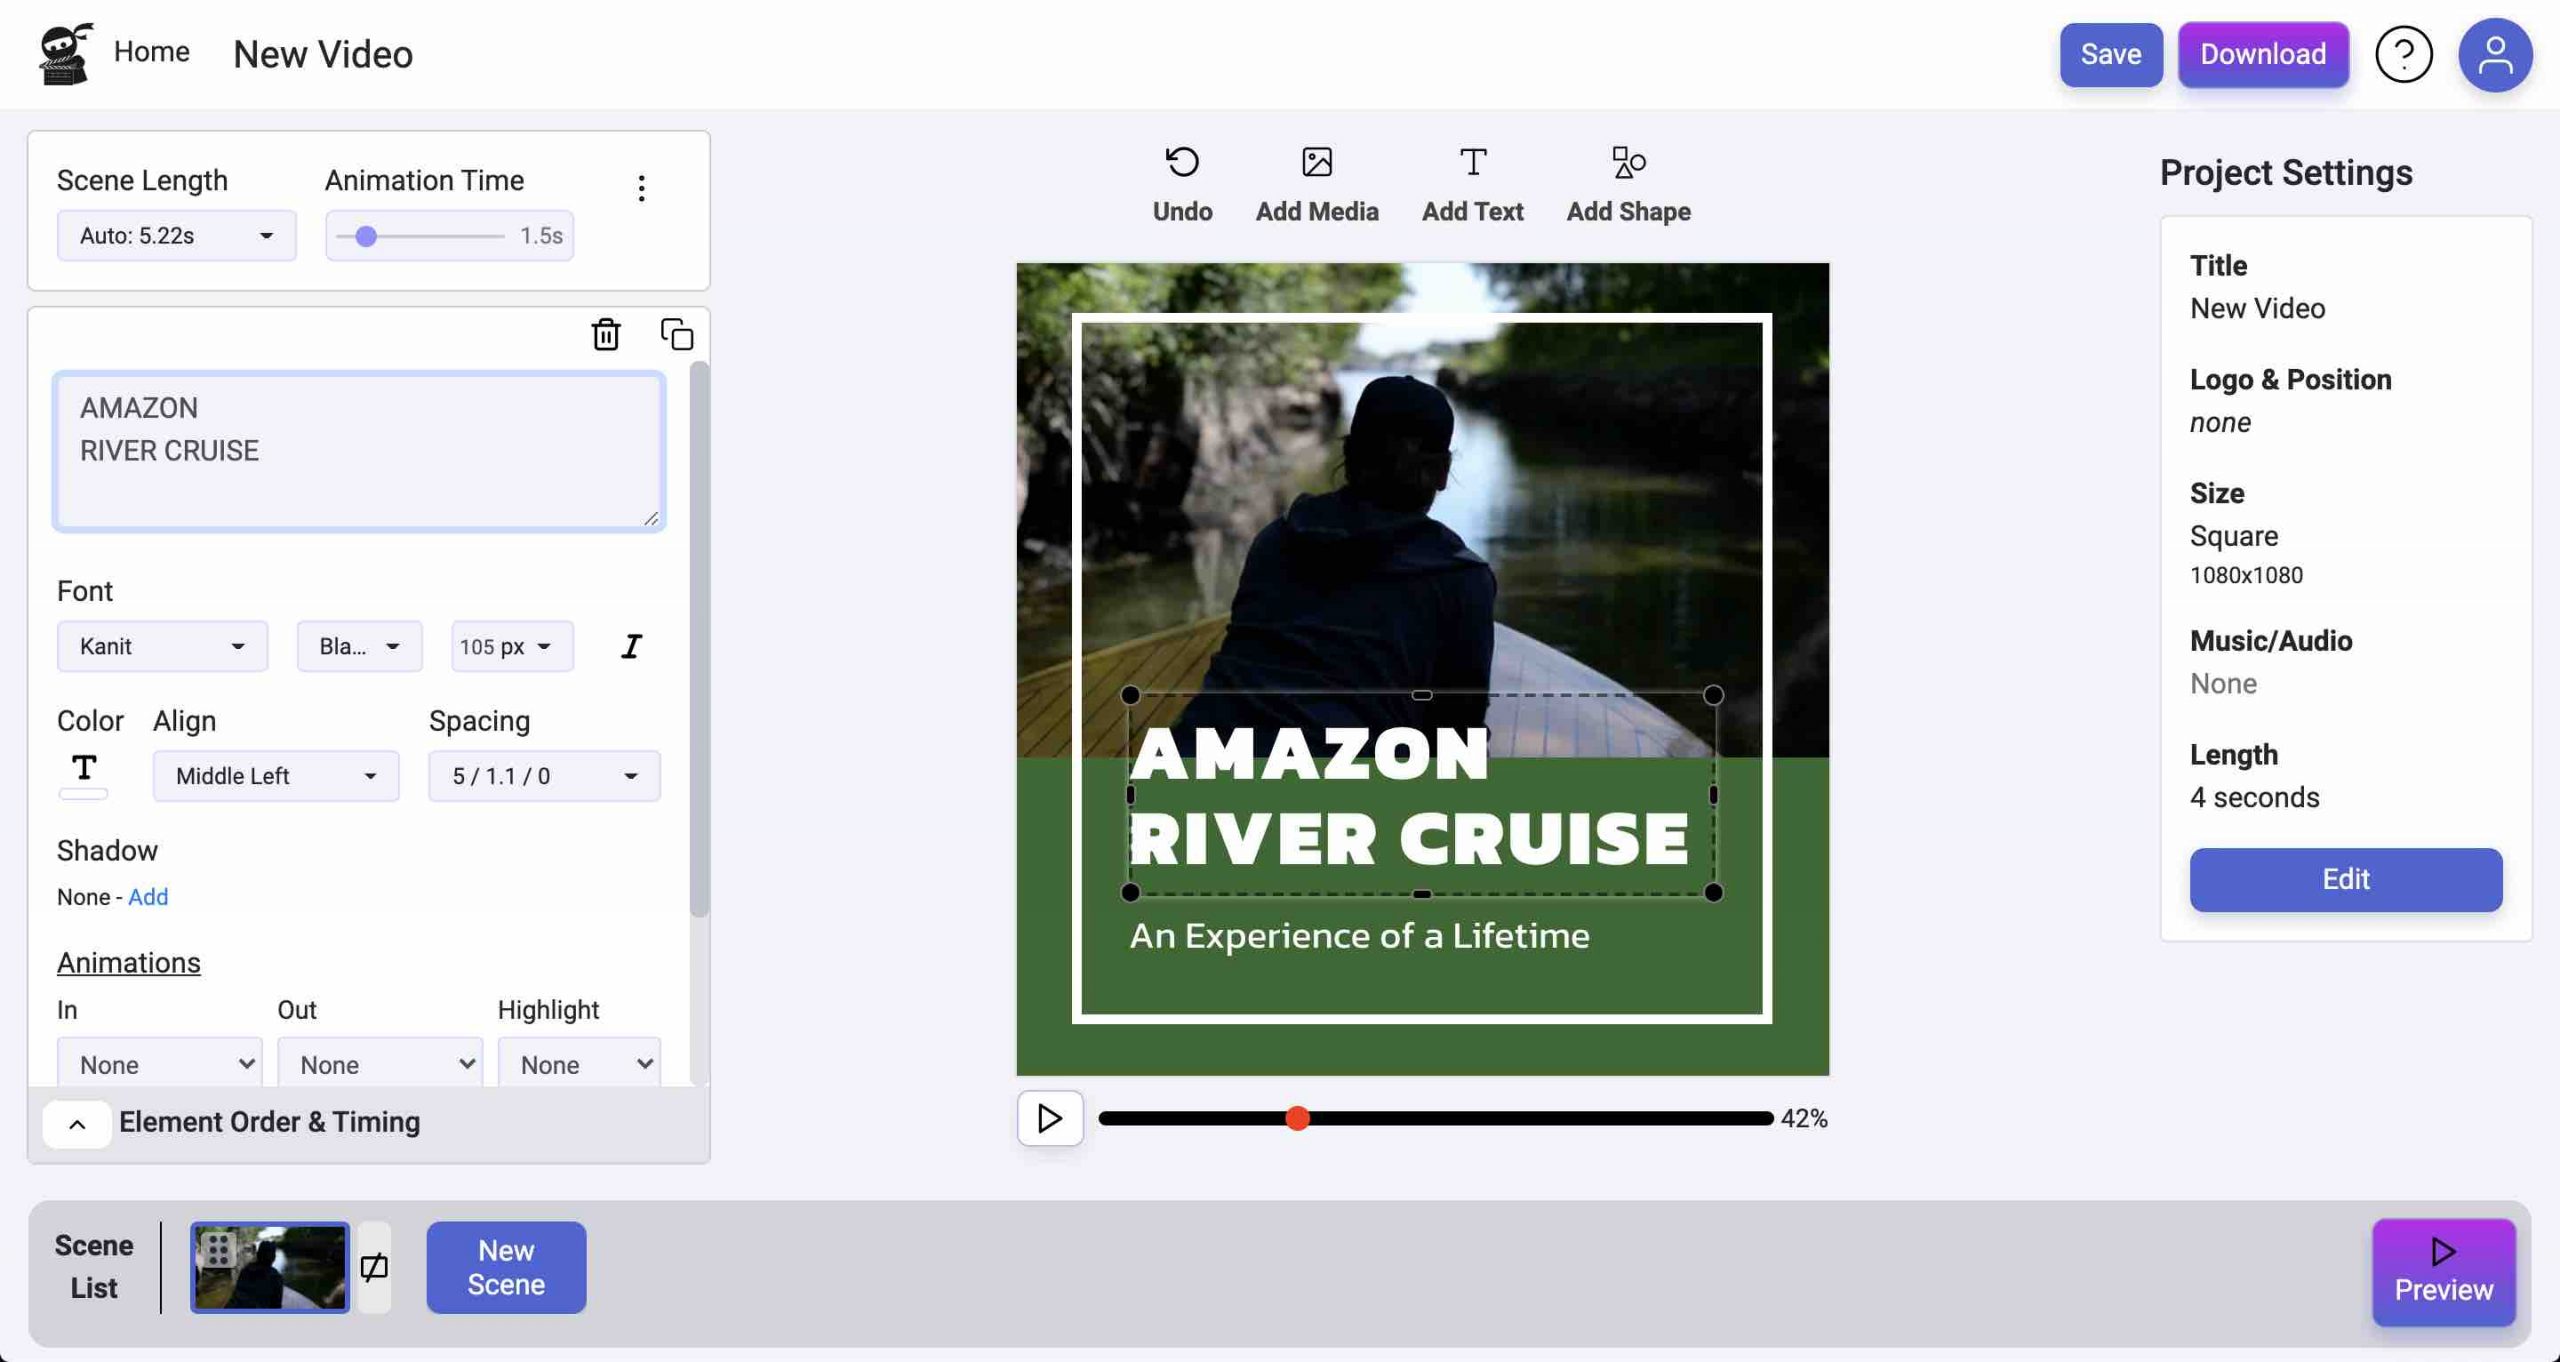
  5. But we do more than that. You can also add shape, text and image overlays to the video for simple annotations. Just click Save again when you’re done and your new shot will be ready!

We built this because it’s usually a bit awkward to quickly get an image from a video, so you can:

  • Use it as the background for a video thumbnail on YouTube, in an email, or on your website.
  • Share a screenshot of a part you love easily.
  • Meme-ify a funny image from a video that you and your friends can share over and over again.
  • Create a quick teaser for social media.

We know that privacy is important with video content, so our free tools never upload your content to our servers, so your videos are safe and secure because they never leave your laptop.Now you can screenshot your video without dealing with your desktop screenshot app, photoshop, etc.

Need some other free tools? We also have a tool to convert videos, an app to resize them, create gif clips, add text and image overlays, and take screenshots of videos.


Categories
Blog

Free Tools – Image and Text Overlay

Free Video Editing Tools - Image & Text Overlay

This is part 5 of our series on free Vidds tools.

The goal of Vidds is to make the fastest video editing app, but we’ve also created free tools that handle basic video editing tasks without requiring an account signup.

Today we’re talking about our free tool to add image and text overlays to videos.

This tool takes the most time to use, but it’s still a very simple process:

  1. Open the video overlay tool.
  2. Drag and drop your video, or click the red box to select a file from your computer.
  3. Select “Add Overlay”
  4. Now, you can add anything you want to appear over your video. Under the “Add” section, you can choose Rectangle to create a colored box, or Text/Image to layer content.
  5. Once you’ve added one, you can click it in the preview. Then you can drag to move or use the resize bars to change the dimensions.
  6. The preview also has a seek slider so you can see how it looks at different parts of the video.
  7. Once your overlays are ready, click “Go!” to create the new video, then save the video with the Download link.

We built this because overlays are a powerful addition to videos and they have a variety of uses:

  • Create a fun meme out of any video by adding a rectangle with text over it.
  • Embed your logo anywhere on a video you’ve recorded.
  • Use text to add context to what is happening in the video.
  • Block out certain parts of a video.

We know that privacy is important with video content, so our free tools never upload your content to our servers, so your videos are safe and secure because they never leave your laptop.

You don’t have to deal with complex or expensive software, just start adding video overlays right in your browser.

Our other tools can help you do more than overlays. We also have a tool to cut videos, a way to convert them to other formats, create gif clips, resize videos, and take screenshots of videos.

Categories
Blog

Free Tools – Video GIF

Free Video Editing Tools - Video GIF

Convert Video to GIF

This is part 4 of our series on free Vidds tools.

At Vidds, our main app is a full video editing and creation platform in your browser, but we’ve also created free tools that handle basic video editing tasks without requiring an account signup.

Today we’re talking about the video to GIF converter. We created a tool to turn any video into a GIF, in your browser.

It’s super simple to use:

  1. Open the GIF Converter tool.
  2. Drag and drop your video, or click the red box to select a file from your computer. If your browser can’t load the video.
  3. Select “Convert”, and then choose the “Animated GIF” option.
  4. Click “Go!” to start the conversion, then save the video with the Download link.

We built this because creating a video GIF shouldn’t require complex software. For example:

  • You need to embed a GIF in your email to make it more engaging.
  • You want a GIF to loop on your website.
  • You want to quick way to create a GIF meme to share online.

Whatever your reason, our online video GIF creator is quick and easy.

We know that privacy is important with video content, so our free tools never upload your content to our servers, so your videos are safe and secure because they never leave your laptop.

Create a GIF quickly and easily, any time 🙂

We integrate other tools in case you want to do more than create GIFs. We also have a tool to convert videos, a way to convert them to other formats, resize your videos, add text and image overlays, and take screenshots of videos.

Categories
Blog

Free Tools – Video Resize

Free Video Editing Tools - Video Resize

This is part 3 of our series on free Vidds tools.

At Vidds, our main app is a full video editing and creation platform in your browser, but we’ve also created free tools that handle basic video editing tasks without requiring an account signup.

Today we’re talking about the video resizer. We created a tool to resize your videos in your browser.

It’s super simple to use:

  1. Open the video resize tool.
  2. Drag and drop your video, or click the red box to select a file from your computer. If your browser can’t load the video, you may need to click “Convert” to enable additional editing options.
  3. Select Resize, then enter the new dimensions.
  4. Click “Go!” to start the conversion, then save the video with the Download link.

We built this because resizing a video shouldn’t require complex software. For example:

  • You need to make your screencast recording smaller.
  • You need to embed a video on your website, but it shouldn’t be 1080p.
  • You want to store some videos on your phone to view later, but the audio is more important than the video.
  • You want to create a GIF, but need to make it smaller because GIFs use tons of bandwidth.

Whatever your reason, our online video resizer is quick and easy.

We know that privacy is important with video content, so our free tools never upload your content to our servers, so your videos are safe and secure because they never leave your laptop.

Resize your videos quickly and easily, any time 🙂

We integrate other tools in case you want to do more than resize. We also have a tool to trim videos, a way to convert them to other formats, create gif clips, add text and image overlays, and take screenshots of videos.

Categories
Blog

Free Tools – Video Converter

Free Video Editing Tools - Video Converter

mov vs mp4 video file converter

This is part 2 of our series on free Vidds tools.

Vidds is a great way to create videos easily, but we’ve also created free tools that handle basic video editing tasks without requiring an account signup.

This post is about the simplest of our tools – an app that takes various video formats and converts them to mp4 or gif.

There’s not a ton to say about this, and it’s easy to use, but we still want to make sure you’re aware that it’s available free of charge!

It’s super simple to use:

  1. Open the video converter app.
  2. Drag and drop your video, or click the red box to select a file from your computer.
  3. If your web browser can’t load the file, you will see a “Convert” button – just click it and it will convert the video to an mp4 file. If that’s all you need, you’re done and can Download the new file 🙂
  4. Now you will see additional options, including the “Convert” link. You can choose mp4 or gif.
  5. Click “Go!” to start the conversion, then save the video with the Download link.

We built this because sometimes you just have a weird video format and need to convert it to something that can be used on your website.

We know that privacy is important with video content. Our free tools never upload your content to our servers, so your videos are safe and secure because they never leave your laptop.

If you can’t use your video as-is, try the video converter to use your video online.

The converter is very basic, but we’ve integrated all of our free tools into the interface. You can also crop your videos, change the video size, create gif clips, add text and image overlays, and take screenshots of videos.

Categories
Blog News

Vidds 2.0 Update

Vidds 2.0 Update:
The 6 Month Cut

When we launched Vidds earlier this year, we planned to provide monthly Vidds updates on our blog. It turns out launching, talking to users, and building what they want can be time consuming! 😛

We’ve been announcing new features in our newsletter, but haven’t kept up on the blog, so we decided to summarize all of the features since our launch in one big Vidds 2.0 update post!

Don’t be surprised if you notice a theme for these new features — they’re all focused on making video creation and editing easier, so you can spend less time while creating better videos!

There’s so much packed into this Vidds 2.0 update post, you might just want to read this TL;DR to see what’s relevant to you 😉

  • Quick Start Videos – Full videos you you can quickly use, customize with your own content, and download.
  • Reusable Scenes – Save any scene you create or customize so you can use it in your other videos later.
  • Multiple Audio Tracks – Add multiple tracks, for example if you want music and a voice over.
  • Scene Transitions – Easily add sleek transitions between your scenes.
  • New Render Engine – Our new render engine is up to 10x faster.
  • Music Library Upgrade – Tons more tracks, genres, and a UI to make it easier to find what you want.
  • Brand Kits – Save your fonts and colors, then apply it to any video.
  • Affiliate Program – Love Vidds? Share the love and make some money.
  • Animations – Fun new animations to make your videos stand out and highlight important content.
  • Video Sharing – Quickly share your renders.
  • Keyboard Shortcuts – Edit more quickly and accurately with keyboard shortcuts.

QuickStart Videos

Need to knock out a quick social media post or create a quick promo? Check out our new QuickStart videos at the top of your dashboard!

These are curated videos ready for you to customize. Just click the “Start” button, customize text, media and colors in each scene, then download your new video!

Just like any video you create, these are fully customizable. You can change elements and styles, add or remove scenes, resize, and much more.

We hope this will help you jumpstart the creation process. Let us know how it goes and what kind of videos you like to post so we can work to create more templates for you!

Create Reusable Scenes

Do you want a similar intro or outro in all of your videos? Have you created that perfect template for your main content? Awesome! Let’s get your existing scenes working harder for you!

If you’d like to reuse a scene in your other videos, just click the 3 dots in the upper left corner (next to “Scene Length” & “Animation Time”), then select Save and give it a name.

Now, whenever you add a scene to a video, you’ll see a list of your saved scenes so you can add them in!

Multiple Background Audio Tracks

Sometimes one background audio track isn’t enough. You might need to have music and a voiceover. Well, now you can easily do that with our multiple audio tracks feature. Simply click “add audio track” in the project settings section and then select which tracks you want to use (choose from stock or upload your own), then simply set the volume and you’re good to go.

Scene Transitions

Video creation with Vidds gets better with every new feature, and this is a good one. We released 6 new scene transitions which you can add between scenes for a more dynamic, polished look to your videos!

Scene Transitions
Scene transitions in action.

Add transitions by clicking the icon between scene thumbnails in the Scene List. Then select the transition that you’d like to use and set the speed by clicking the gear icon to fine tune the look a feel.

Adding scene transitions

Selecting a scene transitionConfigure scene transition

1. Cut

The most common transition in video editing is the cut or “jump cut” where you move directly from one scene to the next without any effects.

2. Fade

The popular and subtle “fade” transition blends the current scene with the next for a smooth transition from one to the other.

3. Slide

Choose from Up, Down, Left and Right for this awesome sliding transition!

4. Flip

For an exciting and dynamic transition use the “Flip” option, it will literally spin your world around (before putting it right again!).

5. Blast Out

This fast zoom out transition packs a punch and will bring any video to life.

6. Blast In

Cousin of the Blast Out, the Blast In offers a fast zoom in transition – they naturally work well together for a great outcome.

Our New Render Engine is Live!

One of our more complex technical improvements, we built a new render backend to speed up the process and make it more reliable.

The new renderer is awesome and speeds up the export time for all videos, but it really begins to shine when videos are a minute or more in length, where it can improve render times by up to 10x!

Render speed

Our Music Library got an Upgrade! ️

We had a pretty limited set of background audio tracks. It was difficult to find one that fit, both because of the limited list, and the interface wasn’t easy to navigate.

This update means we’ve now doubled the size of our music library! We made a concerted effort (pun intended) to broaden the selection of music. To improve the experience of adding music to your videos, we’ve included both genre and mood filters to help you find exactly what you’re looking for!

Add audio to video

But that’s not all! You can now add stock music directly in your scenes by clicking the “Add Media” button and choosing “Stock Audio” to access the list. That means you can put a short music clip in a single scene.

Don’t forget that you can also add multiple background audio tracks if you’d like to have a voice over and music 🙂

Brand Kits are Here! ️

If you create videos often, you know how hard it can be to keep a consistent look and feel for each element and between scenes. To help with this, we just launched Brand Kits in Vidds, and it’s crazy easy to get started!

When editing a video, just click the “Brand Kit” option in the Project Settings section on the right. Next, click “Create New Kit”, then select the fonts and colors you’d like to use. Yep, it’s that easy!

Once you’ve done that, new elements you add will automatically use your brand selections! And once you’ve created a brand kit, you can use it in all of your future videos 🙂

Brand kits even work on the library of Vidds’ pre-designed templates!

Vidds Update - Brand Kit List
Vidds Update - Brand Kit Editor

More details about Brand Kits

What is a brand kit? In Vidds, it gives you a Heading font, a Regular font, and 5 colors: Primary (text), Secondary (highlights/background), and 3 accents. Those are recommended uses, but you can swap and use them any way you see fit!

Your older videos will not automatically apply brand kits, but your new ones will.

If you’ve applied a brand kit to your video, but want to retain the original style of a template you add, you can just click the 3-dot menu and choose “Disable Branding” to disable it just for the one scene.

You can create multiple brand kits and switch between them in any video. This is great for subtle differences, dark mode, or working with multiple brands.

You can edit your brand kit fonts and colors at any time. Once you save the changes, it will apply to all videos that use that kit!

Even if you’re using a brand kit, you can still change the fonts and colors of individual elements any time you need to. Brand kits are an extension, and they’re not meant to lock you into the 2 fonts and 5 colors provided.

You can also disable branding for a video by selecting “No Brand Kit”

We Have an Affiliate Program!

It’s official. We’ve launched an affiliate program for Vidds users. This means rewards in return for every referral that signs up to a paid Vidds plan!

You can contact us to join the program!

An affiliate program is important to us as it’s a way to give back to the Vidds community as we continue to grow and develop our product.

Animations

We added some new animations. These are “Highlight” animations, so they happen while your elements are in view and can help add character and movement to your scenes.

Vidds Update - New Animations

– Perspective: Add a 3D aspect to your elements!

– Float: This was our first “repeating” animation. Choose this to have your element float up and down slowly, great for drawing attention to text or giving background elements some motion.

– Pulse: Similar to the repeating Float animation, this animation repeats slowly, but grows and shrinks in-place, giving you more options for drawing attention to an element.

Share your videos easily!

After you’ve rendered a video, we hope you’re excited to show your team, client, boss, aunt or whoever you share your videos with. Right next to the Download button, we’ve added a Share tool. It creates a link you can send to others so they can quickly view the video – no need to download and send files!

If you’d like a layer of privacy to restrict who can view your video, you can set a password so only those with the link and the password can access it.

We also track the number of views of the video, so you can see how many times it’s been watched.

Next to the Download button, there’s now also a “Play” button so you can see the full rendered video before you download or share it!

Vidds Update - Share Videos
Password protected share

Keyboard Shortcuts

Keyboard Shortcuts

Edit more precisely (and more quickly) with keyboard shortcuts!

Sometimes, your mouse just isn’t enough. If you need pixel-perfect videos, or just want to speed up your workflow, a keyboard can be your best friend!

Try out the new keyboard shortcuts in Vidds

We’re releasing an initial version of shortcuts with the most common and useful actions available at the tip of your fingers.

Here’s the full list: (quick note – On MacOS, the Cmd/Command key is used instead of Ctrl)

Left/Right/Up/Down: Move the selected element 1 pixel using your arrow keys.

Shift + Arrow Keys: Need to move them farther? Use Shift + an arrow key to move the element 10 pixels.

Ctrl + Arrow Keys: Use the Ctrl/Cmd key with an arrow to change the width or height of an element by 1 pixel. You can combine this with the Shift key to change it by 10 pixels.

Ctrl + Z: Undo

Delete/Backspace: Delete the selected element.

Ctrl + S: Save your video

And one more, for the mouse: Shift + Drag

When you are using your mouse, you can now hold down the Shift key to disable snapping to the grid.

And More...

We also made plenty of smaller changes to make your life easier. There are too many to list, but here are a few.

Project Settings

Instead of one edit button, each option in the Project Settings (on the righthand side) is now directly editable which saves time and is less confusing.

Edit the Project Title in the Nav Bar (at the top)

We removed the title from Project Settings, you can now edit it directly at the top, in the nav bar, just click the title and change it.

Element Order & Timing section

We cleaned up the look of the timing bar, and now the points where an element animates in or out are indicated by the soft gradient at either end. Also, when an element is selected we now indicate this by highlighting it within the Element Timing & Order list.

Crop Videos & Images into Shapes

Want your profile picture in a circle or your product image inside a star? We’ve added a quick shape crop feature so you can instantly crop your videos and images into exciting shapes to make your videos more fun. You’ll find it next to the “Media Size” options when editing a media element.


We Keep Going!

At Vidds, we constantly strive to make video creation quick, easy, cost effective, and as fun as possible. We’re excited about what the next 6 months will bring!

You, the Vidds Creators, keep us going. There is no better feeling than getting feedback and building tools that we know will help. So keep in touch, and let us know any time you find something to improve Vidds!

Getting started with Vidds

Getting Started with Vidds The Dashboard – “Create” Section Above is the Create section – here you’ll find the most common videos you can create with Vidds.

Read More »
Categories
Blog

How our Video went Viral on Reddit

How our Video went Viral on Reddit

How our video went viral on reddit - screemshot

How I took the #1 spot in r/bitcoin

N.B. Don’t read this if you’re not willing to experiment and take some risks with your Reddit account.

Growth hacking is hard, and marketing on reddit is even harder. Reddit users are exceptionally savvy to spotting that wolf-in-sheep’s-clothing hidden marketing message and they don’t take well to them.

It’s also difficult since “open” subreddits don’t bring the value you’d expect. Turns out that everyone knows they’re about self-promotion and posts there rarely perform well.

The holy-grail is the large, active subreddit where your post has the opportunity to go viral and get shared around other subreddits.

Viral video post - subreddit member info

The Viral Formula

So, how did I manage to get a video to 5.5K upvotes and 304 comments in 24 hours?

  1. Identify an active subreddit where videos perform well
  2. Pick a culturally relevant topic that will resonate with this audience
  3. Create a meme that includes humour and a truth about this community

The Specifics

1. Finding the right subreddit shouldn’t be too hard, you’re looking for a large number of members and a significant amount online at any one time. I chose r/bitcoin which has 2.7m members and upwards of 10k online at any given time. Another thing to look for is if this subreddit is posting a lot of video content and how well those posts generally perform. You want to see upvotes in the thousands and comments in the hundreds from previous posts, and these kind of numbers need to be the rule not the exception. It should also be a subreddit that contains your target audience

2. Reddit is a community which has its finger on the pulse, it’s exceptionally culturally relevant and this is reflected in the posts that perform well. It’s important to angle your post at something that is important to this audience right now. For my post, I highlighted the volatile nature of bitcoin and did so a time when a lot of people were starting to join the crypto movement and not only this, it was during the “bull-run” up to Bitcoin’s highest ever price.

3. Memes distill a feeling, emotion or sentiment that is experienced by a set or subset of society into a piece of short-form digital content, often an image or video with accompanying text. I created a video that utilised a scene from a well known film where a family ride a rollercoaster. I added the caption “When you finally buy into bitcoin”. This meme had multiple layers that would speak to different people.
– The visual comparison of the bitcoin journey to a rollercoaster ride
– The caption providing context and humour to the current bitcoin situation
– The famous clip itself creates nostalgia and makes people reminisce (John Candy was in the scene)

Top Tip. Include your logo as a faded watermark or as final scene to bring some brand awareness and give yourself credit when the video is shared around

Takeaways

This strategy worked for us in this subreddit because our product helps people create videos and memes so we are specifically targeting active audiences that enjoy memes and video content and are therefore likely creating this kind of content themselves. So it’s important to find subreddits where the members would actually have use for your product or services.

This tactic boosted my karma to over 4.0k in 24 hours which gives a lot of karma juice to use across the Reddit platform.

The increased traffic was noticeable from this experiment but it didn’t blow us away, I think if we’d picked a more video editing or content marketing focused subreddit we might have seen better results. But the increase in karma has been exceptionally valuable in terms of social-proof across my other posts and comments since (not sure if I’ve just got better at creating engaging content or if this has helped?).


See the original post here.

Categories
Blog

Top Video Trends and Ideas 2021

Top Video Trends and Ideas 2021

A complete guide to the top video trends and ideas for 2021

It’s been true on the web for 10+ years: If you want to make money online, you need to learn how to capture, and keep, attention.

We’re all learning how to do it consistently. Whether it’s on social media, a landing page, product page, advertisement, or YouTube, the goal is always the same. Get someone’s attention quickly, then make sure the content engages them enough so they hang around to see what you have to say.

Videos are definitely at the top of the list now. Even a plain text video with the exact same content you’d put in a post or page copy catches the eye with movement, and it can easily be augmented with images and videos. You always know exactly how it will look to every user.

So what are the top video styles early this year?

E-Commerce Product Videos

Close to my heart, from working with Shopify store owners, are e-commerce product videos. When I see a product online, the first thing I do is look for a video. Whether it’s a pair of socks or a high-end laptop, I want videos that tell me about the product.

Generally, marketers say to start with the benefits the product provides – how it improves the purchasers life. Luckily, with video, you can do that and link it to things like quality, comfort, and specifications.

An opening scene can be used to intrigue the viewer using questions or a statement with a solution. Use media, whether an image or a video, to intrigue them by showing part of the product, or blur/darken it as a background.

If you use high quality materials, be sure to highlight it in your video – just a single close-up, in-focus image or 2-3 second recording can work wonders on convincing a viewer that you backup your claims.

Have happy purchasers? Show testimonials! New to the industry? Create quotes from you or your employees that show you know what you’re doing. And if at all possible, show a human face – it gives a huge boost to credibility!E-Commerce videos do a few things really well: They are fast attention grabbers, they build trust and authority, and they get viewers interested enough to see what else is on the page – the product information and Buy buttons.

Product and Service Explainers

We like to think that our tagline is enough to get people to read what’s on our landing page, but that visitor may have just looked at 10 similar products, and their mind might’ve turned to goo.

If there’s one way to overcome that, it’s with video. You can easily mix text, images, audio, and video clips together to make your explanation clear and concise.

As usual, you can make a clear problem statement or question that speaks to your visitors, and affirm that you can solve it.

Follow it up with clear examples of it being used, the results it provides, how it benefits them, or other pertinent information.

Just like e-commerce, quotes and testimonials always help inspire confidence with social proof.

Don’t worry if you can’t fit your entire app, service, etc, into a single video. Hit the high points so they are encouraged to find what they need on your website.

Industry News and Editorial

A social media account that is just trying to sell something is hardly social at all! Talking about your industry and interests helps remedy that.

Maybe there’s some new tech you’re using where you can explain how it makes a product more precise, last longer, or cost less. What about exposing issues that you believe should be addressed? Is the industry making progress to be more clean or promote social welfare?

News and editorial content can help keep your followers interested in what you post, rather than feeling worn down.

And if you like, you can use it to encourage comments. It’s always nice to see “What do you think about this?”

Behind The Scenes

We live in a crazy, inter-connected world, and that drives all of us to seek out information about what we care about.

A behind the scenes look at part of a process, a quick explanation, or even catching a glimpse of employees or CEOs can make us feel more connected to who we buy from or listen to, and helps humanize you.

Keep watching this space. While some strive to show an almost robotic public face, customers are increasingly seeking out authenticity.

Inspirational Quotes and Stories

Just like the behind the scenes style videos, inspirational quotes and stories connect us to those we’re following and purchasing from. It shows a human side.

These style videos may not be new, but they’re still very effective.

To some, inspirational quotes just seem like a cheesy poster on a wall, but if you get the tone right and hit at the right time, they can truly change someone’s perspective, and do exactly what they say – Inspire them to do something.

Stories may have some of the same effects, but they can also be used to simply engage your social media followers and help give them a reprieve from what is often a feed of worries and cynicism.

If you’re the one who consistently brightens someone’s day or inspires them to action, they’re going to be fans for a long time to come.

Curiosity, Questions, and Thinkers

Sometimes, we don’t just want to have a horde of followers, but also want to learn from them, and show that they’re engaged with you to someone new.

Asking questions, hinting at a solution (or multiple solutions), and encouraging curiosity can trigger the “I. Must. Respond.” response.

Visually demonstrate a problem you have and show some potential solutions. Ask what their favorite feature is, or what their biggest problem is with a product, industry, etc.This is a quick way to get to the “talk to, not at, your audience” frame of mind. Video is the icing on the cake that gets them to stop and think instead of scrolling past.

Content/Podcast Clips

The next cliche to get through is “show, don’t tell.” Especially so if you’re a content business. These videos are often simple and easy to produce.

Take existing content, add a clip to a video, maybe an intro/outro scene, and you’re done! Make sure it’s a great clip – if you show a clip of the dull parts so the juicy bits are buried deep, somewhere else, they’re more likely to think you don’t produce interesting content.

But it’s also fine to cut out the resolution, or the most exciting part. Cliff-hanger dramas are being mass-produced now for a reason. Our version of “In the next episode…” is “Listen to the full podcast episode” or “We’ll show you exactly how this is solved in our full course!”

Conscious Business - Forward Thinking

As has been mentioned already, your brand has a running equity with your users on social media and elsewhere. Is the end result of watching or reading your posts a feeling of despair, guilt, and anguish? No way! No matter what happens, you want your followers to feel happy, excited, or up-beat about how you’ll help.

One way to do this is to show you have a conscience. Similar to other methods of giving your business a touch of humanity, this shows that you care and you want to give back.

Obviously, depending on your audience (or audiences!) and culture, you can do this in a myriad different ways. Greenness, serving your locality, helping individuals, etc, there are plenty of ways to highlight that you are looking forward to great things to come.

Miss something?

Let us know if we missed a key trend or style of video that you think is going to be popular in 2021. This is isn’t an exhausted list and we love the opportunity to add to articles and learn something new.

Conclusions of the top video trends and ideas 2021

The key takeaway for 2021 video trends and ideas is that it’s going to as important as ever (if not more so) to engage your audience with your authentic voice.

In the vast ocean of content it’s more and more difficult to stand out from the crowd. People are over-exposed to videos and they want to see content that resonates with them and their beliefs. 

So whatever video content you end up creating, make sure that it speaks to your values and gives your audience the opportunity to engage with you at a level far below surface impressions.

More from our blog:

Facebook Ad Video Sizes

Facebook Ad Sizes

Facebook Ad Video Sizes Up to date Facebook Ad Video Sizes Facebook Ads are a powerful tool for any brand or business. Not only can

Read More »
Categories
Blog

What is an online video editor and how does it work?

What is an online video editor and how does it work?

A complete guide: Discover what an online video editor is and how does it work

If you’re a small business, you might be thinking a lot more about videos these days. They engage viewers, show authority, social media companies promote video content, and they look great in a feed. Whether it’s on social media, landing pages, product pages, or blogs, videos add a unique and satisfying element to content.

Large companies pay hundreds of thousands of dollars for ad campaigns and creative content, which usually end with videos. But we don’t have that kind of budget, so we need a way to <link? create simple content ideas> and bring them to life on a budget.

Desktop video editors are complex beasts (like we say, you shouldn’t need a phd to create great video content), and online video editors are bringing easy to use tools to market quickly.

We want to make creating videos just as easy as creating social media images and graphics.

At Vidds.co, we focus on making it dead simple to complete these tasks. Here are some of the things Vidds is great at, and all accomplished online, in your browser:

  • Creating videos without video content. Making it easy to animate text and images into beautiful videos.
  • Clipping your video content. Take a video from your phone or camera, and clip it so it only plays back the parts you want.
  • Combining both of the above. Using your video clips and content, mixing it with text, images, and designs to make professional content.
  • Beautiful, customizable scenes. Pre-designed scenes that look great and highlight your content in unique ways, animated to fit together.

The problem is, most online video editors require you to learn how to use timelines, which also take a lot of time to get just right. Or, alternatively, they have nice video designs but have absolutely no flexibility beyond changing some text or images.

At Vidds, our goal is to build a web-based editor to make most things easy, and the hard things possible.

So now you know what an online video editor is, how does it work, exactly?  We want to show you just how easy it is to create a video, right in your browser!

Starting with scenes

We break up each video into “scenes.” This is just a list of each part of your video, like an intro scene, your content, outros, and more.

We have a ton of predesigned themes that look great, but each one is customizable so you can change text, images, videos, colors, fonts, and more. You can remove elements (text, videos, images, shapes, etc) that you don’t want, and you can also add more elements if it needs more style.

Pre-designed Template Video editing

(A sample of some of the designs in Vidds)

It is crazy easy to work with Vidds because of the scenes. We auto-calculate how long it should be based on the videos and text, and make it really easy to add as many scenes as you want to get your point across.

If you don’t need a design and just want to include a video or clip, you can use a Custom design, add your video, and resize it to cover the full canvas.

That’s all I need to know about "What is an online video editor and how does it work?"

Yeah, kind of! It really is that easy to use Vidds to create videos. Add scenes, customize the content, and you’ve got yourself a well-crafted video!

It’s not often you can just drop in new content and an editor knows what to do with it, and we’re extremely excited to see what everyone does with our editor.

But like I said above, while we aim to make most things easy, we also want to make the hard things possible. The features of Vidds don’t end here.

We’ve taken all of the common video tasks and made them as easy to take care of as possible!

Clipping/Trimming Videos

We have 2 clever ways of integrating videos with your scene: If you’re adding a video as a background or stylistic element, you can set the playback to “Automatic” – so it just plays back the video as long as the rest of the content in the scene.

If it’s the primary content, you can tell it to play back the entire video, so the scene will last as long as your video.

But there’s one more. Say you’ve recorded a 1 minute video, but there’s only a 10 second clip in the middle that you want to display. We have a really easy clip tool to do just that!

Online Video Editor 2

Background Music

We have a curated list of background music in various genres to fit your video, so you can give it that extra style. You literally just click through our music selection to listen, select the one you like, and Vidds adds it to your video!

What is an online video editor and how does it work? 3

Logo Overlays

If you want to show your logo through your entire video, we also make that really easy! It’s just another setting – choose the image, select the palcement (and adjust the size or offsets if you need to tweak it a bit) and you’re set!

What is an online video editor and how does it work? 4

Audio Mixing

Audio mixing sounds complicated – you’ve got background music that’s playing too loud, or you have multiple videos in different scenes and one is louder than the other. You’d think that’s a pain to fix, but we provide a volume control for each video or audio track so you can adjust it, then play it back to make sure it’s just right.

GIF Support

Need to make memes, short content, or videos to share in an e-mail? No problem, when you click to download your video, just switch it to GIF and we’ll do it for you! Instant shareable video content.

More great blog posts:

Categories
Blog

Create Your First Video

Create Your First Video

How to find your way around the Vidds editor for the first time to quickly and easily create the perfect video for your needs!

How to create your first video - step by step

Step 1 - Create a new project

Create a new project from the Vidds creator Dashboard.

  • Click the “New Video” button (highlighted in blue below)
Create new project - Create your first video

Step 2 - Name your project

Give your new Vidds project a name

  • Enter the name in the empty text field
  • Click the “Next” button
New Video Screenshot

Step 3 - Choose the video shape and size

  • Click on the preset size that fits your needs 
  • or create a custom sized video by clicking the “Custom” option
  • Once you’ve chosen the size you want, click the “Next” button
New Video - Select Video Size

Step 4 - Select a video scene template

  • Browse the options or filter the results by using the dropdown list at the top
  • Once you have made your decision, click the thumbnail of the template you’d like to use for your first scene
  • Your video project will be auto generated and you will be redirected to the Vidds creator
    or
  • Click the “Create Your Own” button to start with a blank scene, then add your own elements and begin customising
Create your first video - Scene Select

Step 5 - Customise your first scene

Edit Elements List
  • Click on the video canvas to select an element you would like to edit 
  • or select the element directly in the “Elements Order & Timing” tab on the lefthand side at the bottom of the configurator 

Each element can be edited in multiple ways.

Media

  • Choose media size – “Cover” or “Fit”
  • Select “In animation” & “Out animation” as well as a “Highlight” that will happen during the scene
  • Choose a background color for the element – the default is transparent
  • Resize elements using the sizing handles in the corners and center of each side 
  • Change the position of the element, you can do this by simply dragging it and dropping it where you’d like it
Media Element Edit - Create Your first video

Text

  •  Update the Text in the box at the top of the text element configurator
  • Select a font and the text alignment you would like
  • Choose a color for your text and the size you’d like it to be
  • Customise the letter spacing, line height and padding (space around the edge of the text)
  • Add and configure a text shadow – useful when the text lacks contrast from the background
  • Choose an “in animation”, “out animation” & “Highlight”
  • Add a color block behind the text by clicking the circle below “Background” label in the “Container” section
  • Change the position of the text element by dragging and dropping it to the position you’d like on the scene preview video
Edit Elements

Shape

  • A shape element can be used as overlays or backgrounds for other elements
  • Select the shape that you’d like to use
  • Resize the element using the sizing handles in the corners and center of each side
  • Choose an “in animation”, “out animation” & “Highlight”
  • Change the border width to make it thicker or thinner using the “Border Width” slider control
  • Add or change the color by clicking the circle below the “Fill Color” label
  • Adjust the border color by clicking the circle below the “Border Color” label
  • Adjust the border radius to round the corners
  • Rotate the element to change it’s orientation within the scene
  • Change the position of the block by dragging and dropping it to the position you’d like
Edit Shape Element - Create your first video

Click the icons above the video canvas to add more elements to your scene. You can edit the scene by clicking on an element in the Element Order & Timing tab to the left or by clicking on the video canvas itself.

Media

  • Change the background image or video – upload your own or use the stock media search that we provide through Pexels
  • Edit the size of the background media, choose from: “fit” and “cover”
  • Control the amount of zoom that is applied to the background image or video

Secondary media

  • Change the background image or video – upload your own or use stock media
  • Control the width of the image or video
  • Change the roundness of corners
  • Adjust the spacing around the image
  • Add borders and change colours

Texts

  • Update the texts with your message
  • Change the width of the text area
  • Select font, size & colour
  • Adjust line height
  • Add text box backgrounds, borders and adjust their size and colours

Step 6 - Add more scenes

  • Click the add scene button found in the scene list section at the bottom of the Vidds Creator
  • Choose the scene template you’d like to use (it will automatically be added to your project)
  • Customise that scene
  • Add more scenes and repeat
Add New Scene

Step 7 - Edit Project Settings

To the right of the video playback window, you will find the Project Settings section. Here you can update a number of different aspects of the project.

  • Add a logo or watermark to your video
  • Add music to your video
  • Adjust size and dimensions

All changes made in the Project Settings section will have an affect on the whole video. Music does not currently playback inside the Vidds Creator and will only playback after exporting the video.

Step 8 - Save and Download your video

In the top righthand corner of the Vidds Creator you will find the two buttons “Save” & “Download”

  • Click the “Save” button after making any significant changes and before downloading
  • Click the “Download” button when you are happy with your video and ready to download it
  • Check the video details and click “Get Video”

Once you’ve clicked “Download” your video will begin to be rendered (built) and will soon be ready to download. If you don’t want to wait around for the video to render you can find it in your dashboard when it is ready to download. Or by clicking the user icon in the top righthand corner and selecting “Completed Projects” – this will show you a list of all your previous videos and provide you the option to download them.

Create your first video - Step 8 Download Video
Create your first video - Step 8 Download Video Render