Categories
Tutorial

How to Use AI to Video Generator

How to Use AI to Video Generator

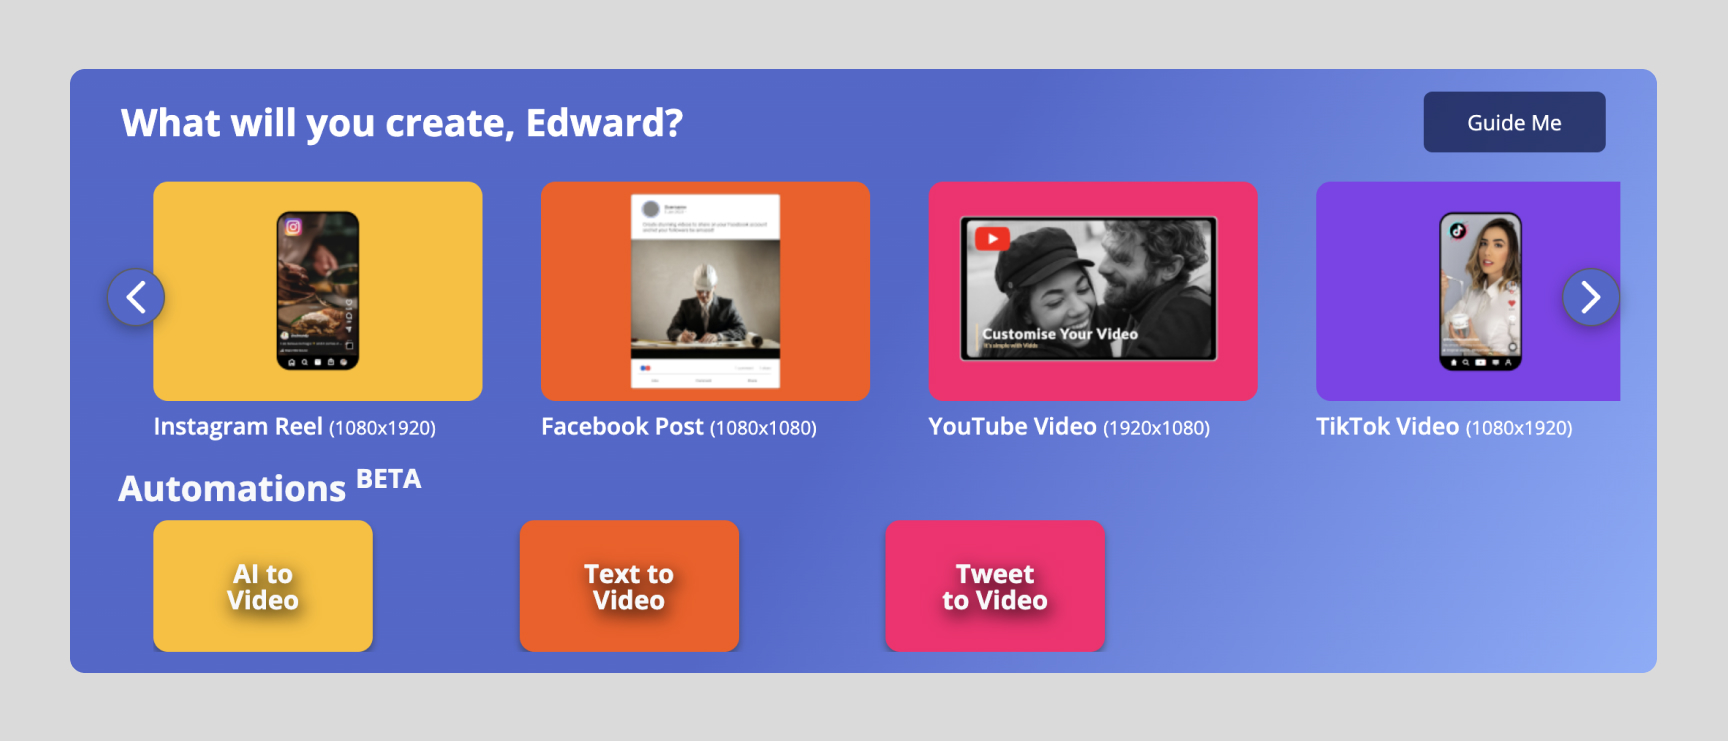
Click "AI to Video" in the Automations section
How to Use AI to Video Generator

To use the Vidds AI Video Generator, click the “AI to Video” button in the Dashboard. As seen above in the “automations” section.

The AI to Video tool will open.

Use the prompt guides to build your prompt:

  • Set the number of points you would like – this will be the number of scenes in your video.

  • Choose between: short bullet points, headlines, paragraphs or how-to points for the text.

  • Add keywords into the empty text box to set the topic of the video.

  • Click “Generate” 

How to use AI to Video Generator Prompt Tool

Video Wizard - Customise Your Video

Video Wizard - How to use AI to Video Generator

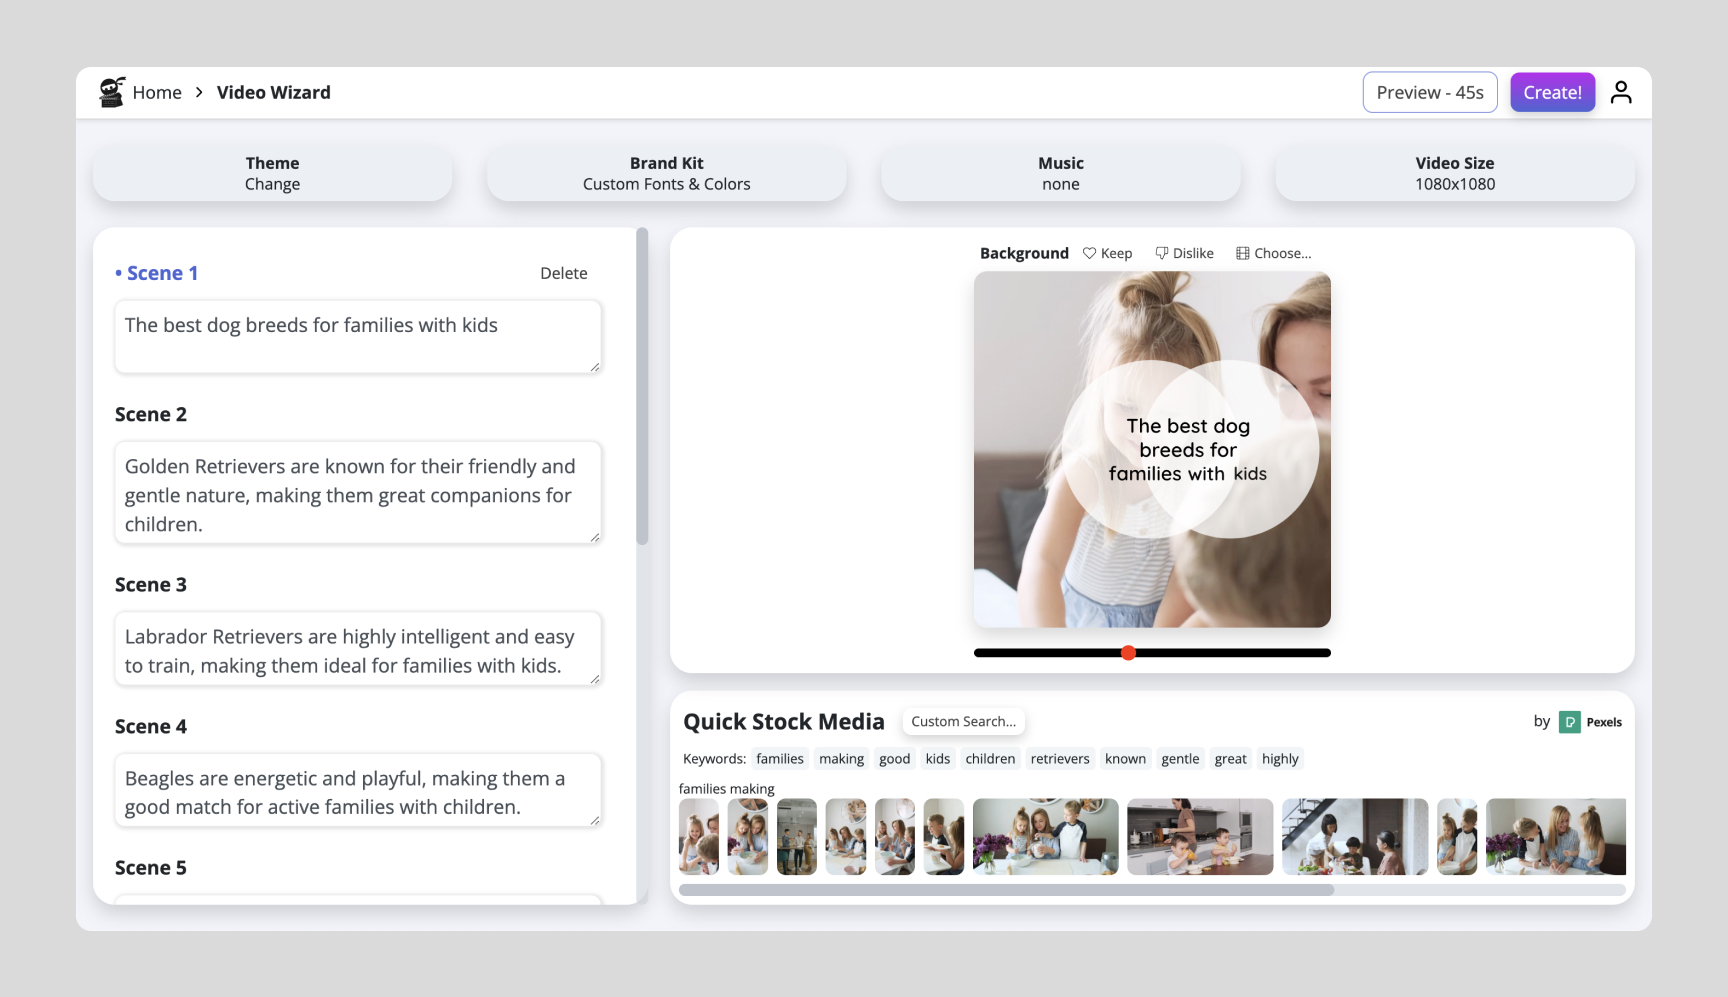
The Video Wizard has sections for each part of the video that is changeable.

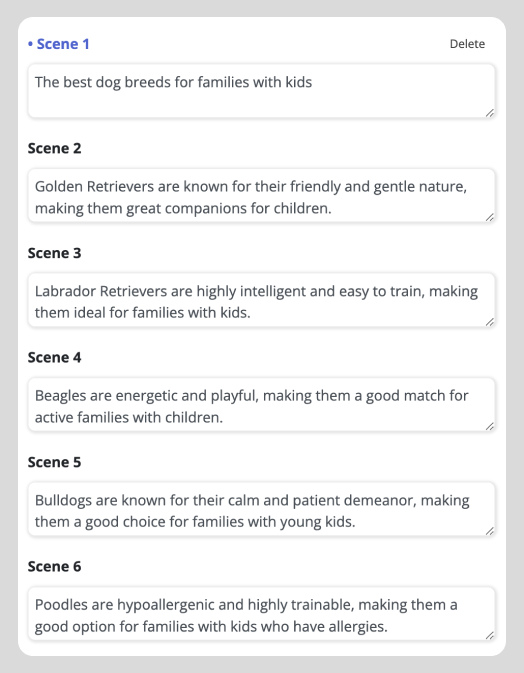
On the left you will find the text for each scene.

At the top, the buttons are your options to change the look and feel of the video

On the right, the preview shows you how the video looks with the background media and text.

Below the preview is the stock video search section. Here you can choose all the media for each scene.
AI Wizard Scene Text editor Video Wizard - How to use AI to Video Generator
add scene AI Video Wizard

Edit Scene Text

To edit the scene text, click the text box for the required scene. The preview on the right will change to show the correct scene.

Add or remove any text that you like. You will see the text in the preview update in real-time.

Switch between scenes by clicking in the text box of the next scene you want to edit. Repeat the process of adding or removing any text that you want.

To add more scenes, scroll to the bottom of the scene text list and click the “add scene” button. There is also an option to add a scene using AI. To do this, add your prompt and allow the AI to generate more texts on your topic for new scenes.

Editing Options - Look and Feel

Video Wizard Editing Options

Theme – our library of theme designs lets you change the look of your video in one click.

How to change the theme:

  • Click the “Theme” button at the top.

  • View the different themes by hovering your mouse over them.

  • Click the theme that you like.

  • The video design changes.

Brand Kits – adjust fonts and colours of your video to match your branding

How to change Brand Kit:

  • Click the Brand Kits button at the top

  • Select, “Create a New Kit”

  • Give the Brand Kit a name

  • Select your new brand kit from the list

  • Complete the Brand Kit design guide by updating all colours and fonts.

  • Click “Save”.

Your video now has your brand kit added. You will see the changes in the preview.

Music – add background music to your video

How to add Music:

  • Click the Music button at the top.
  • Browse the Free Music Library.
  • Filter using the “Mood” and “Genre” lists.
  • Preview the songs using the Play button to the left.
  • Click “Select” on the song you like to add it to your video

Your video now has a background song added.

Video Size – change the aspect ratio of your video

How to change Video Size:

  • Click the video size button at the top
  • Select square, portrait or landscape from the list

Your video size has now been changed. Note that all the text and media are automatically resized.
AI Video Wizard - Change Video 1
AI Video Wizard - Change Video 2

Change Scene Videos

There are two easy ways to change the background video of a scene.

1.

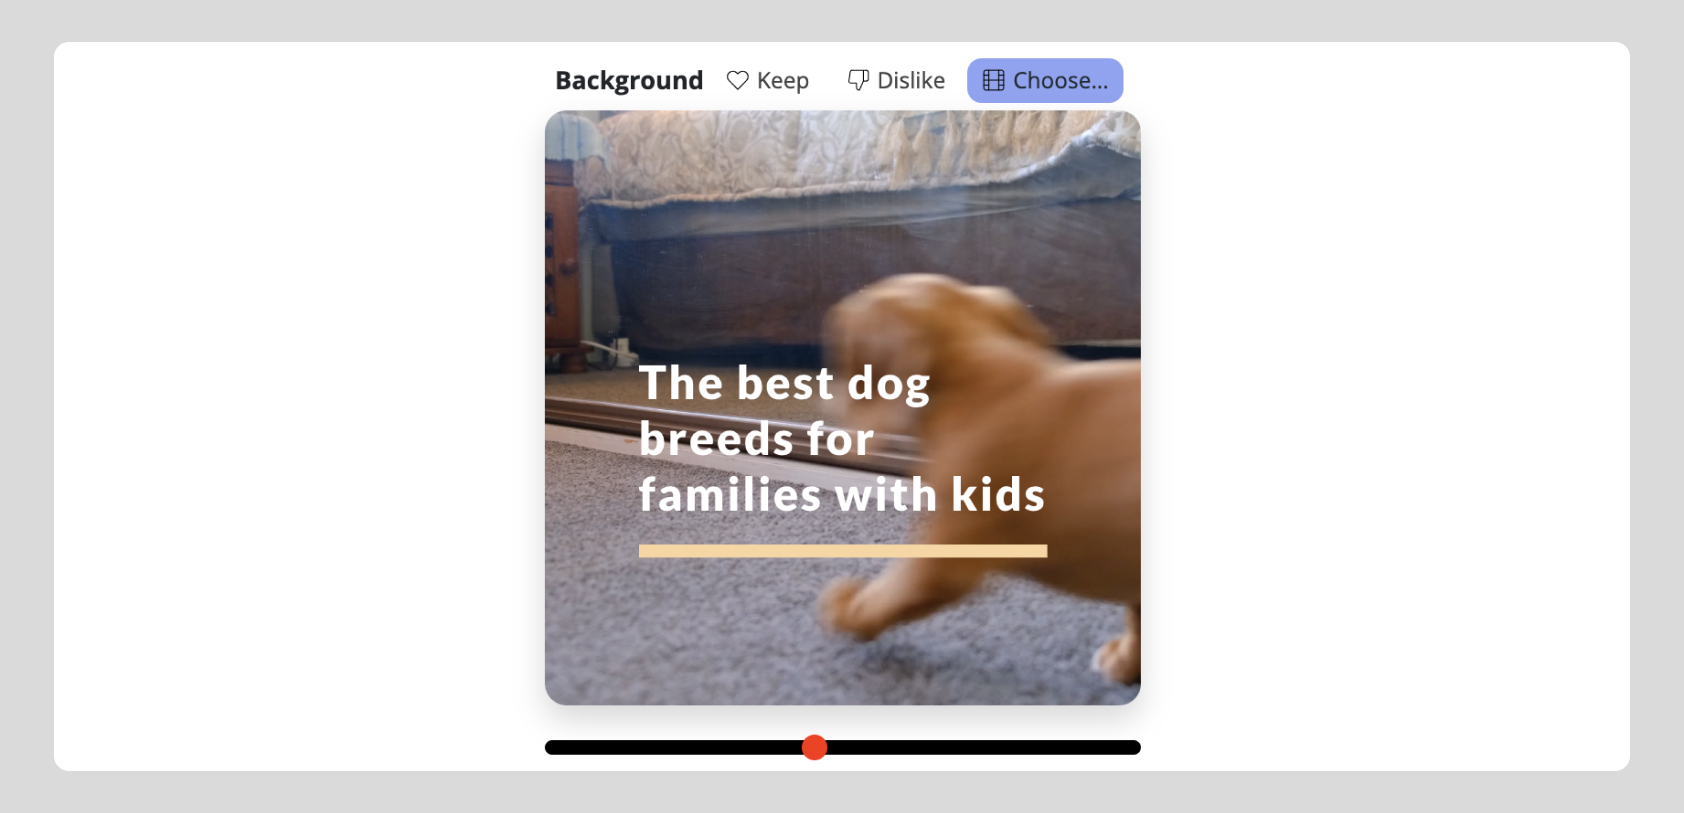
  • In the video preview, click the “choose” button.

  • Upload a video or an image from your computer

  • Select the uploaded video from the “My Library” list

2.

  • Use the Quick Stock Media section

  • Choose one of the videos by clicking the thumbnails

  • Update the Quick Stock Media by clicking the “Keywords” tags above the thumbnails.

  • Search new stock videos by clicking “Custom Search” and adding keywords

  • Switch between scenes by clicking the correct scene text box on the left

  • Repeat the process for each scene

How to use AI to Video Generator AI Video Wizard - Download video

Preview & Export

When you are happy with the content, look and feel of your video it’s time to create it. You can preview the whole video by clicking the “Preview” button in the top right.

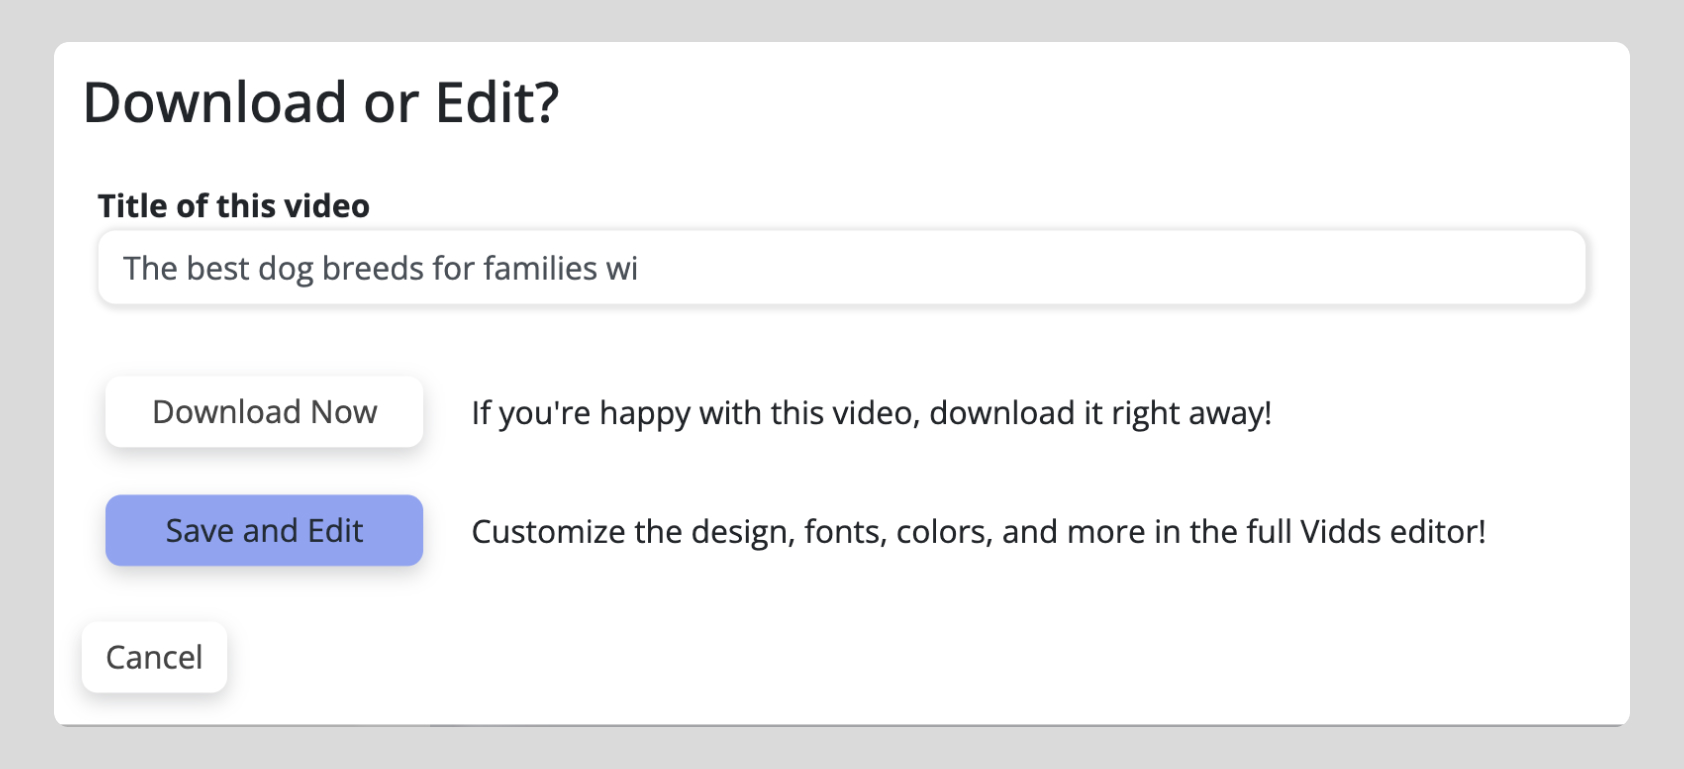
Next, you can create the video by clicking “Create” in the top right. You’ll have the option to “Download Now” or “Save and Edit”. If you are happy with the video exactly as it is, then click “Download Now”. If you’d like to edit the video further or save it for future editing, click “Save and Edit”. The Save and Edit option allows you to make changes using all the features of the Vidds main video editing tool.

More from the onboarding series

Getting started with Vidds

Getting Started with Vidds The Dashboard – “Create” Section Above is the Create section – here you’ll find the most common videos you can create with Vidds.
Read More »
Categories
Tutorial

Create a video from a template

Create a video from a template

Getting started

There are two ways to get started with on of our pre-designed templates.

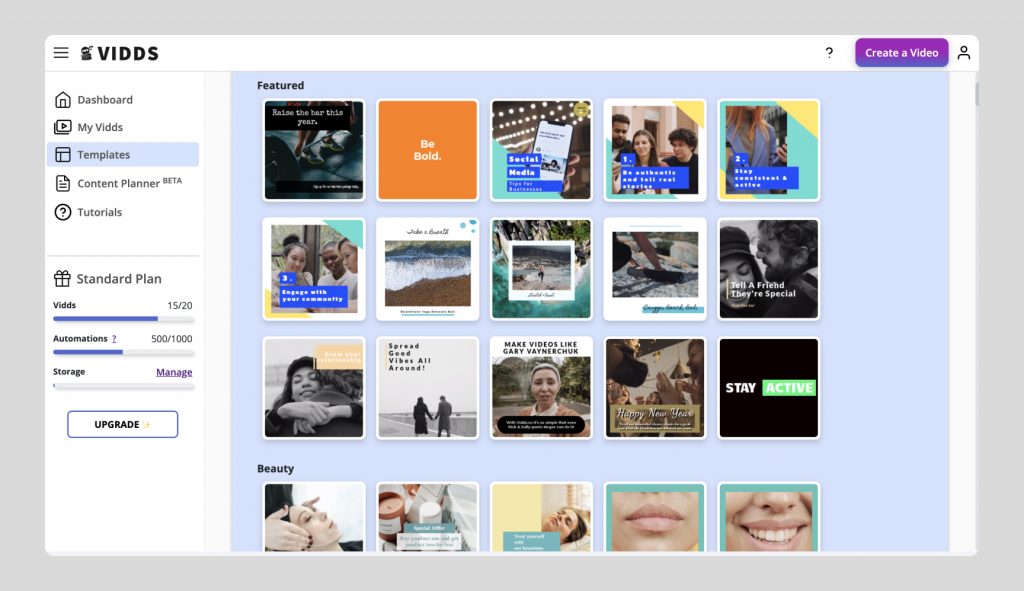
  1. Head to the “Templates” page in the dashboard (found in the menu on the lefthand side). Then find a template that you like and click it. The template will be loaded into the Vidds editor ready for you to begin customisation.
  2. Choose a video type from the Create carousel on the homepage or from the “Create a Video” button. Once you click the video you want to create you’ll be taken to the Vidds editor, the template library will be on-screen ready for you to select one. Once you’ve chose a template, simply click it and it will be loaded into the editor ready for customisation.
Vidds dashboard Templates Page
How to Use AI to Video Generator

Customising

Vidds in App - Creating a video from a template

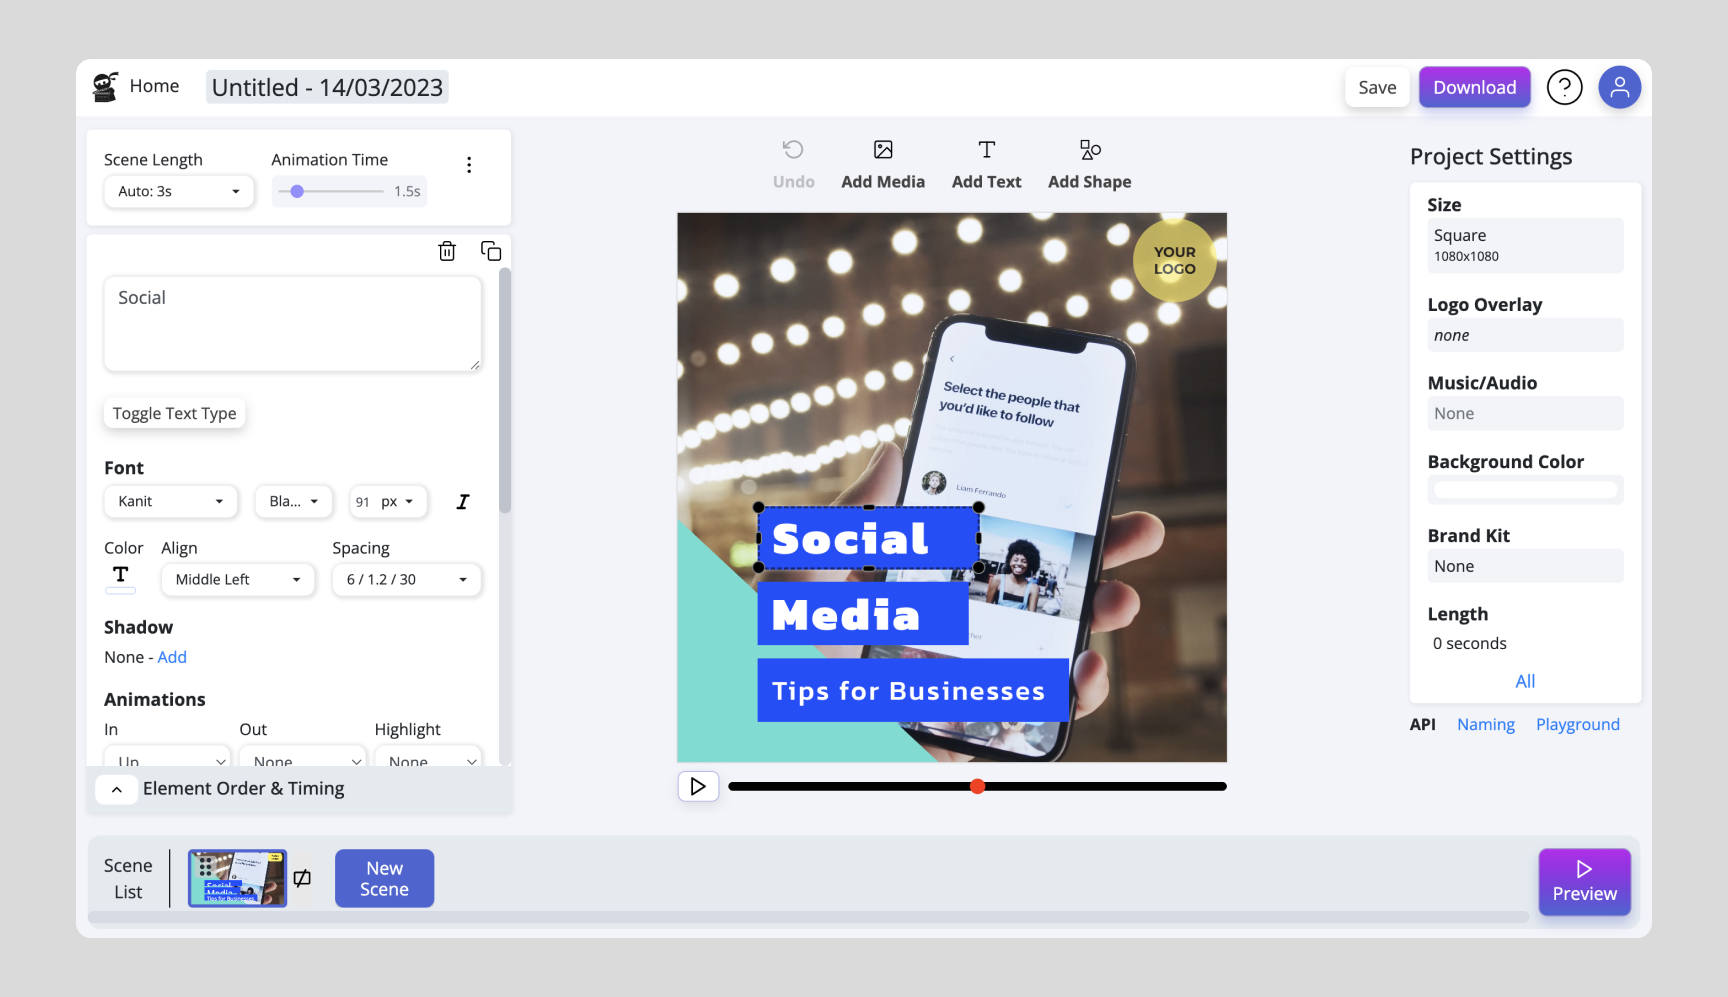
Customising your video is a very simple process. There are three key things to remember:

  1. To customise any element, simply click on it in the video canvas (the video in the middle of the screen).
  2. This will open the editing panel on the lefthand side of the screen. Use the options to customise and make changes to your video – there are many ways to customise each element.  Often the simplest changes such as adding your own images or videos, updating the text and changing the fonts and colours can have the biggest impact.
  3. Add new scenes to your video using the “New Scene” button in the Scene List section at the bottom. Select a template and repeat the process of customisation

Finalising

You’ve added multiple scenes using pre-designed templates, you’ve customised them and now have a great looking video.

But what comes next?

Now it’s time to add the finishing touches!

Using the “Project Settings” menu on the righthand side, you can make some final tweaks and adjustments to the overall video. You have the option to add a logo overlay, add multiple audio tracks – this can be music and/or voiceovers, plus many other options to fine tune the look and feel of your video.

Downloading

Now that your video is finished, it’s time to download it and share it with the world.

Simply click the “Download” button in the top righthand corner of the editor and your video will begin downloading.

More from the onboarding series

Getting started with Vidds

Getting Started with Vidds The Dashboard – “Create” Section Above is the Create section – here you’ll find the most common videos you can create with Vidds.
Read More »
Categories
Tutorial

Getting started with Vidds

Getting Started with Vidds

The Dashboard - "Create" Section

How to Use AI to Video Generator

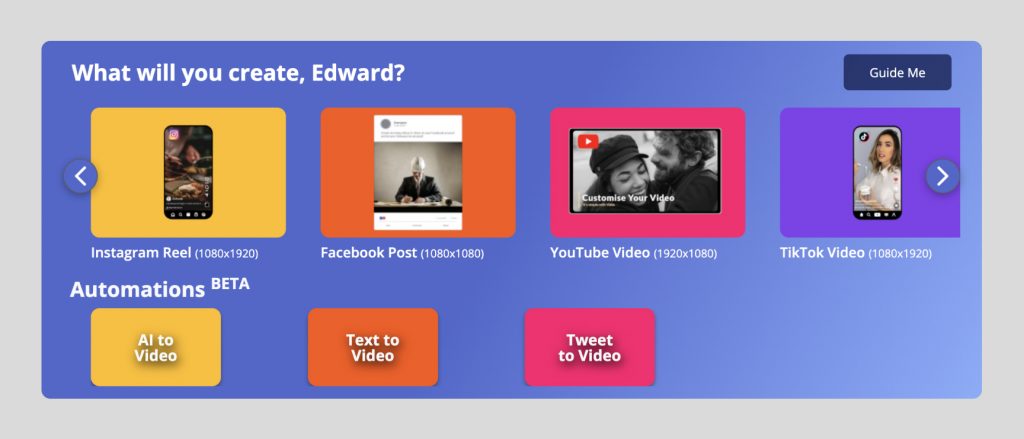
Above is the Create section – here you’ll find the most common videos you can create with Vidds. Use the arrows to scroll through the Create carousel until you find the type of video you want to create, then simply click it to start creating.
Below the Create carousel is the Automations section. These are our video wizards that auto-generate videos for you either from an AI prompt, by adding text or a Tweet link.

Not sure where to start? Click the “Guide Me” button and we’ll guide you step-by-step to the video for you.

Need a custom video? Click the purple “Create a Video” button in the top-right and input your custom dimensions to start creating your video.

Getting started with Vidds - The dashboard Main menu

Main Menu

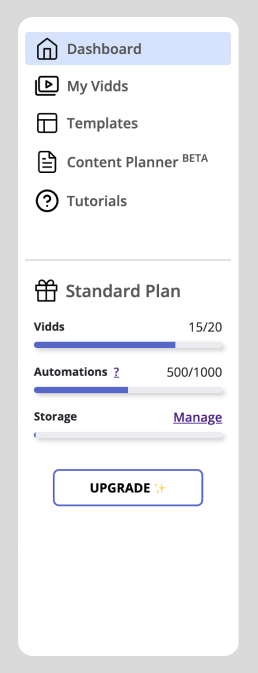
Dashboardbrings you back to the main dashboard home page

My Viddstakes you to a page that contains all of your projects – we call them “Vidds”.

Templatesthis page is a showcase of all our pre-designed templates that you can use to create videos. Quick start your video creation by clicking one.

Content Planner here you can use AI to generate video ideas, build out scripts, and even generate videos.
Tutorialsif you need a helping hand along the way, visit our “Dojo” to see tutorials where you can learn about all of Vidds features and become a master video creator.

Below the menu you will see your current plan and the status of your account’s limits.

The "Planner" Section

Getting started with Vidds - The dashboard Planner section

Jump start your video pipeline by using the AI video planner. Simply input a topic, keyword or phrase and the AI will generate video ideas for you. Click one of the ideas and a video will be automatically created for you.

Getting started with Vidds - The dashboard create a video button

Create a Video button

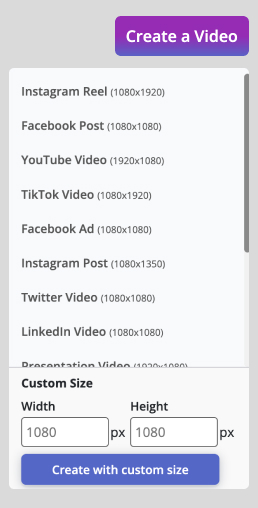
The “Create a Video” button in the top right-hand corner opens a list with all the different pre-set videos. This is just another way for you to find the video that you want to create. 

For a custom video, simply input the width and height into the boxes and then click “Create with custom size”.

User menu

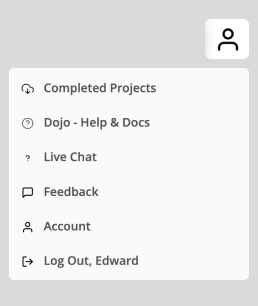
In the top right-most corner of the dashboard you will find the user menu. Clicking the avatar icon will open a list with all the different user menu options.

Completed Projects: This is where you can see a list of all your rendered videos with an option to download, view or share them.

Dojo – Help & Docs: Here you will be taken to our library of tutorials and support docs.

Live Chat: Need immediate assistance from a support agent? Reach out in the live chat.

Feedback: Want to let us know what you like, hate or want to see added. Send us feedback using this button.

Account: See all of your account information, including current plan, past invoices and you can even delete your account here.

Log out: This one is self-explanatory.

vidds dashboard user menu

More from the onboarding series

Getting started with Vidds

Getting Started with Vidds The Dashboard – “Create” Section Above is the Create section – here you’ll find the most common videos you can create with Vidds.
Read More »