How to Create an Animated GIF Thumbnail
How to Create an Animated GIF Thumbnail Introduction I received a great email from my friend, Rufus the other day. He makes a YouTube series
Often, you’ll simply select one of our existing scenes, edit the text, and make some tweaks to the style. Here, we’ll go over adding and editing text elements step by step so you know what’s available and how to create new elements from scratch.
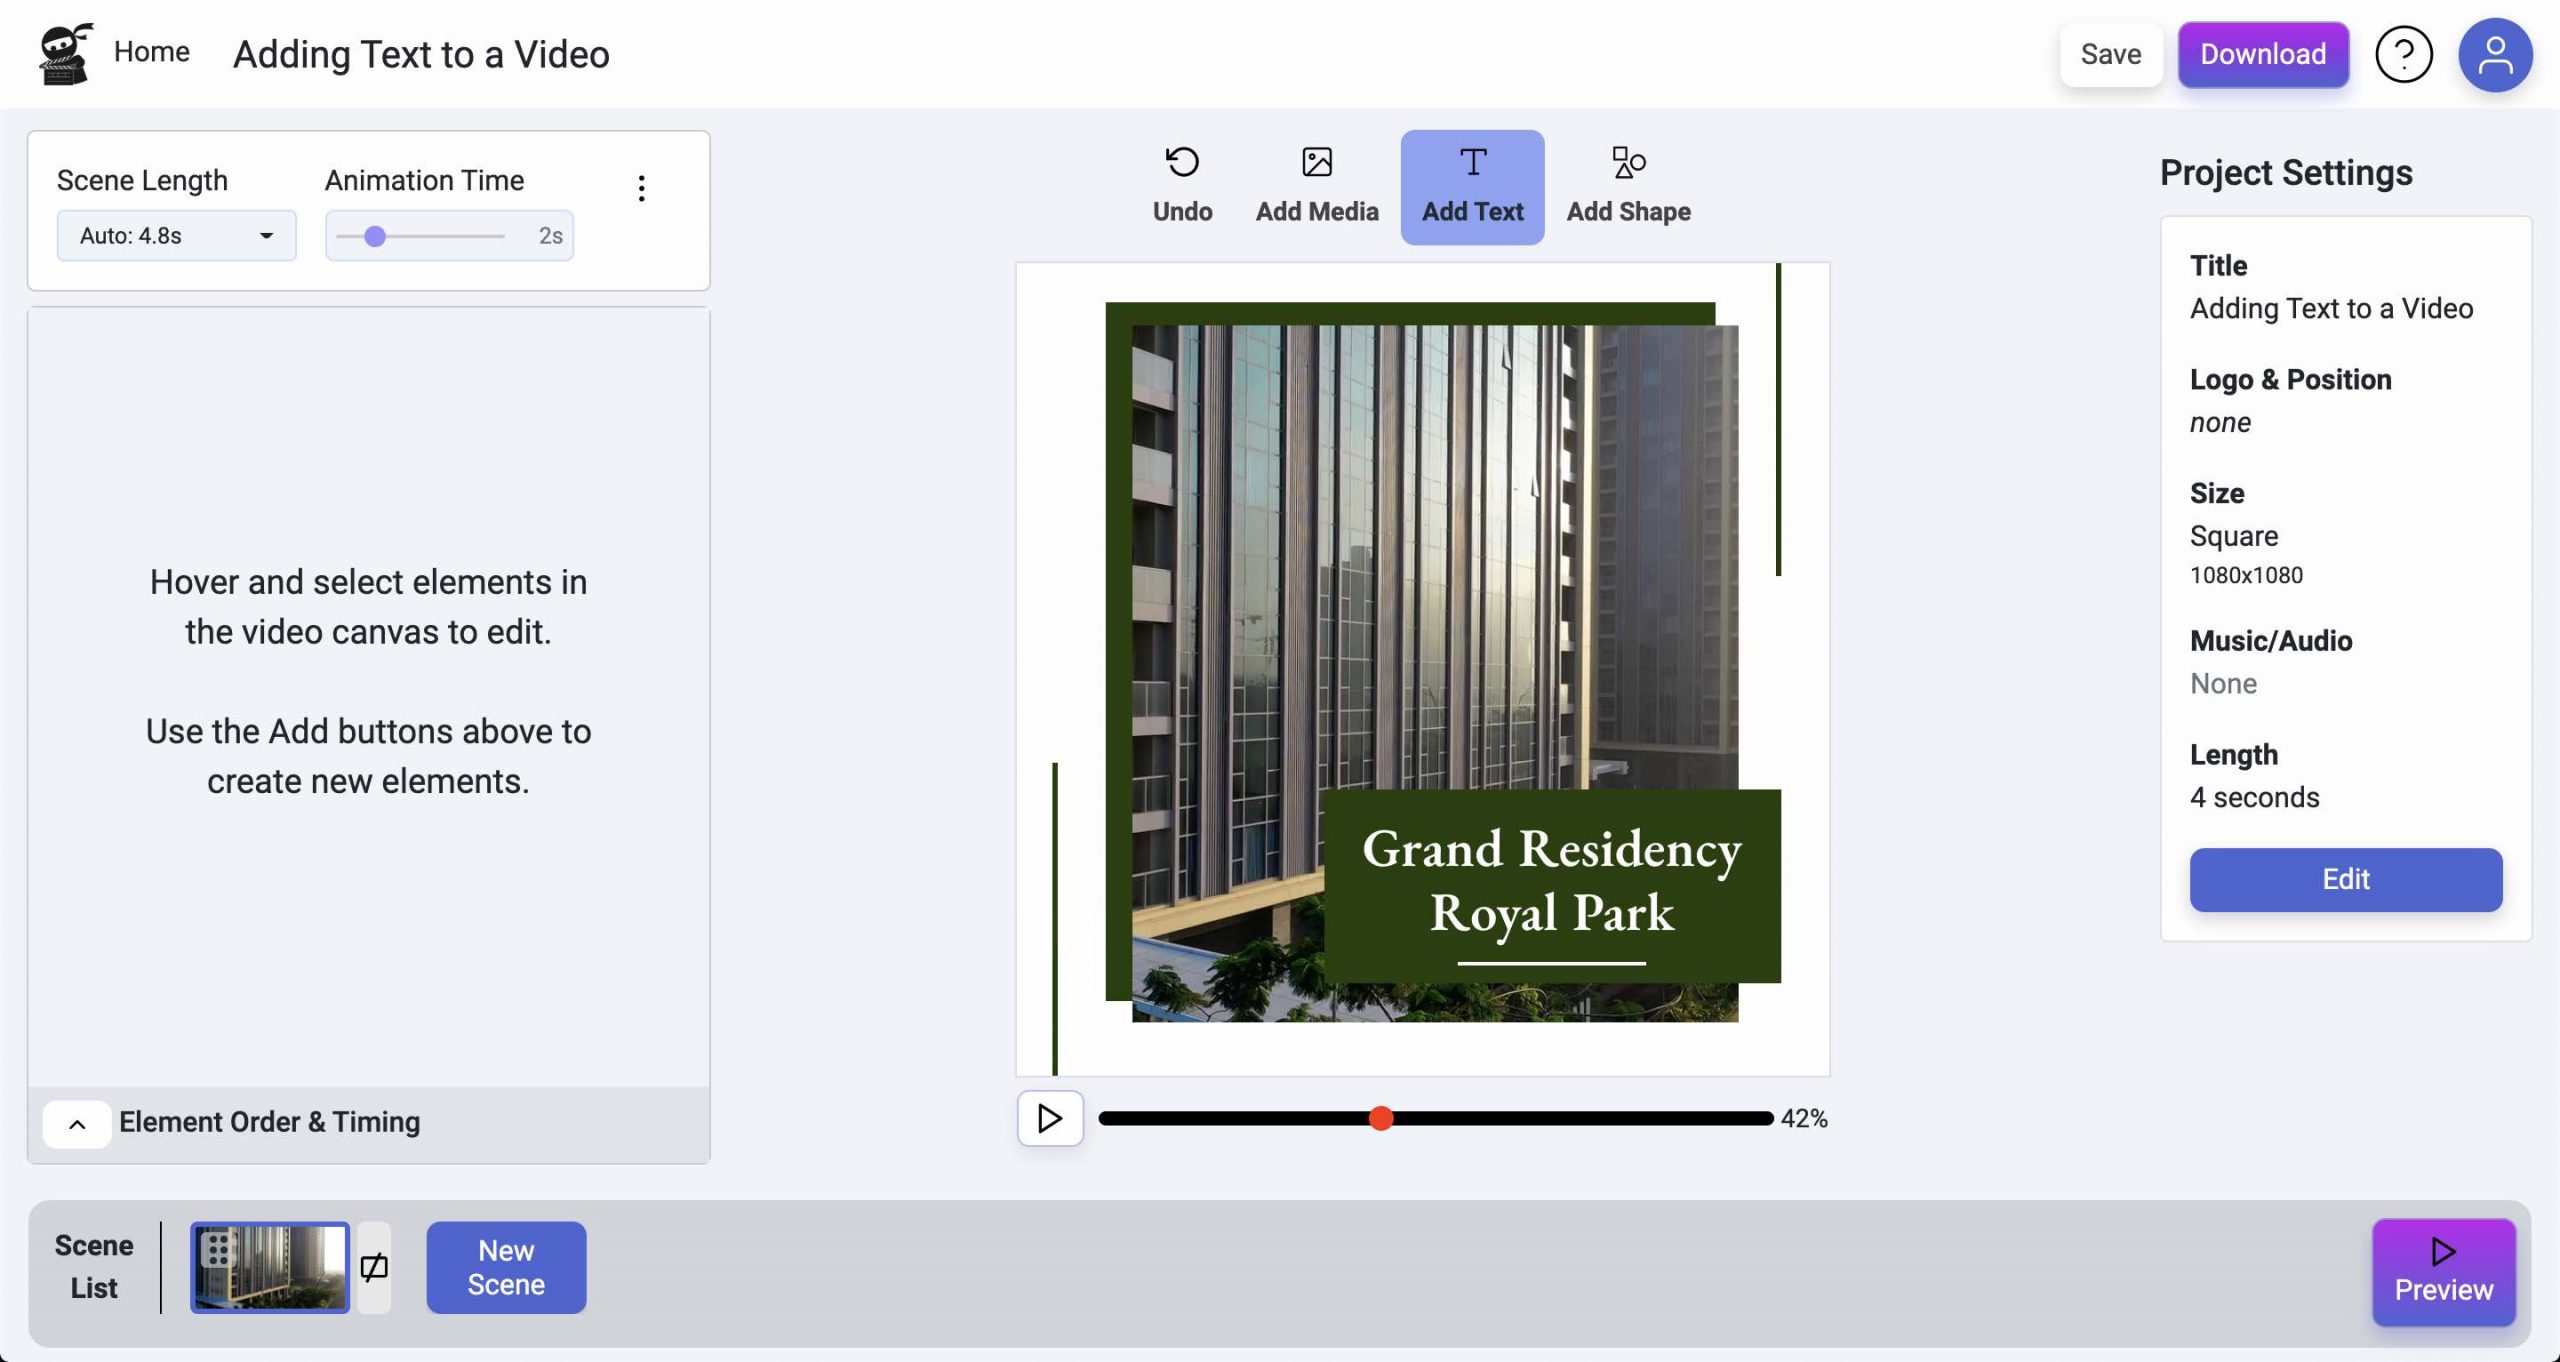
Let’s jump right in by adding a new text element. Simply click the “Add Text” icon at the top of the video canvas to add a text element to your scene.
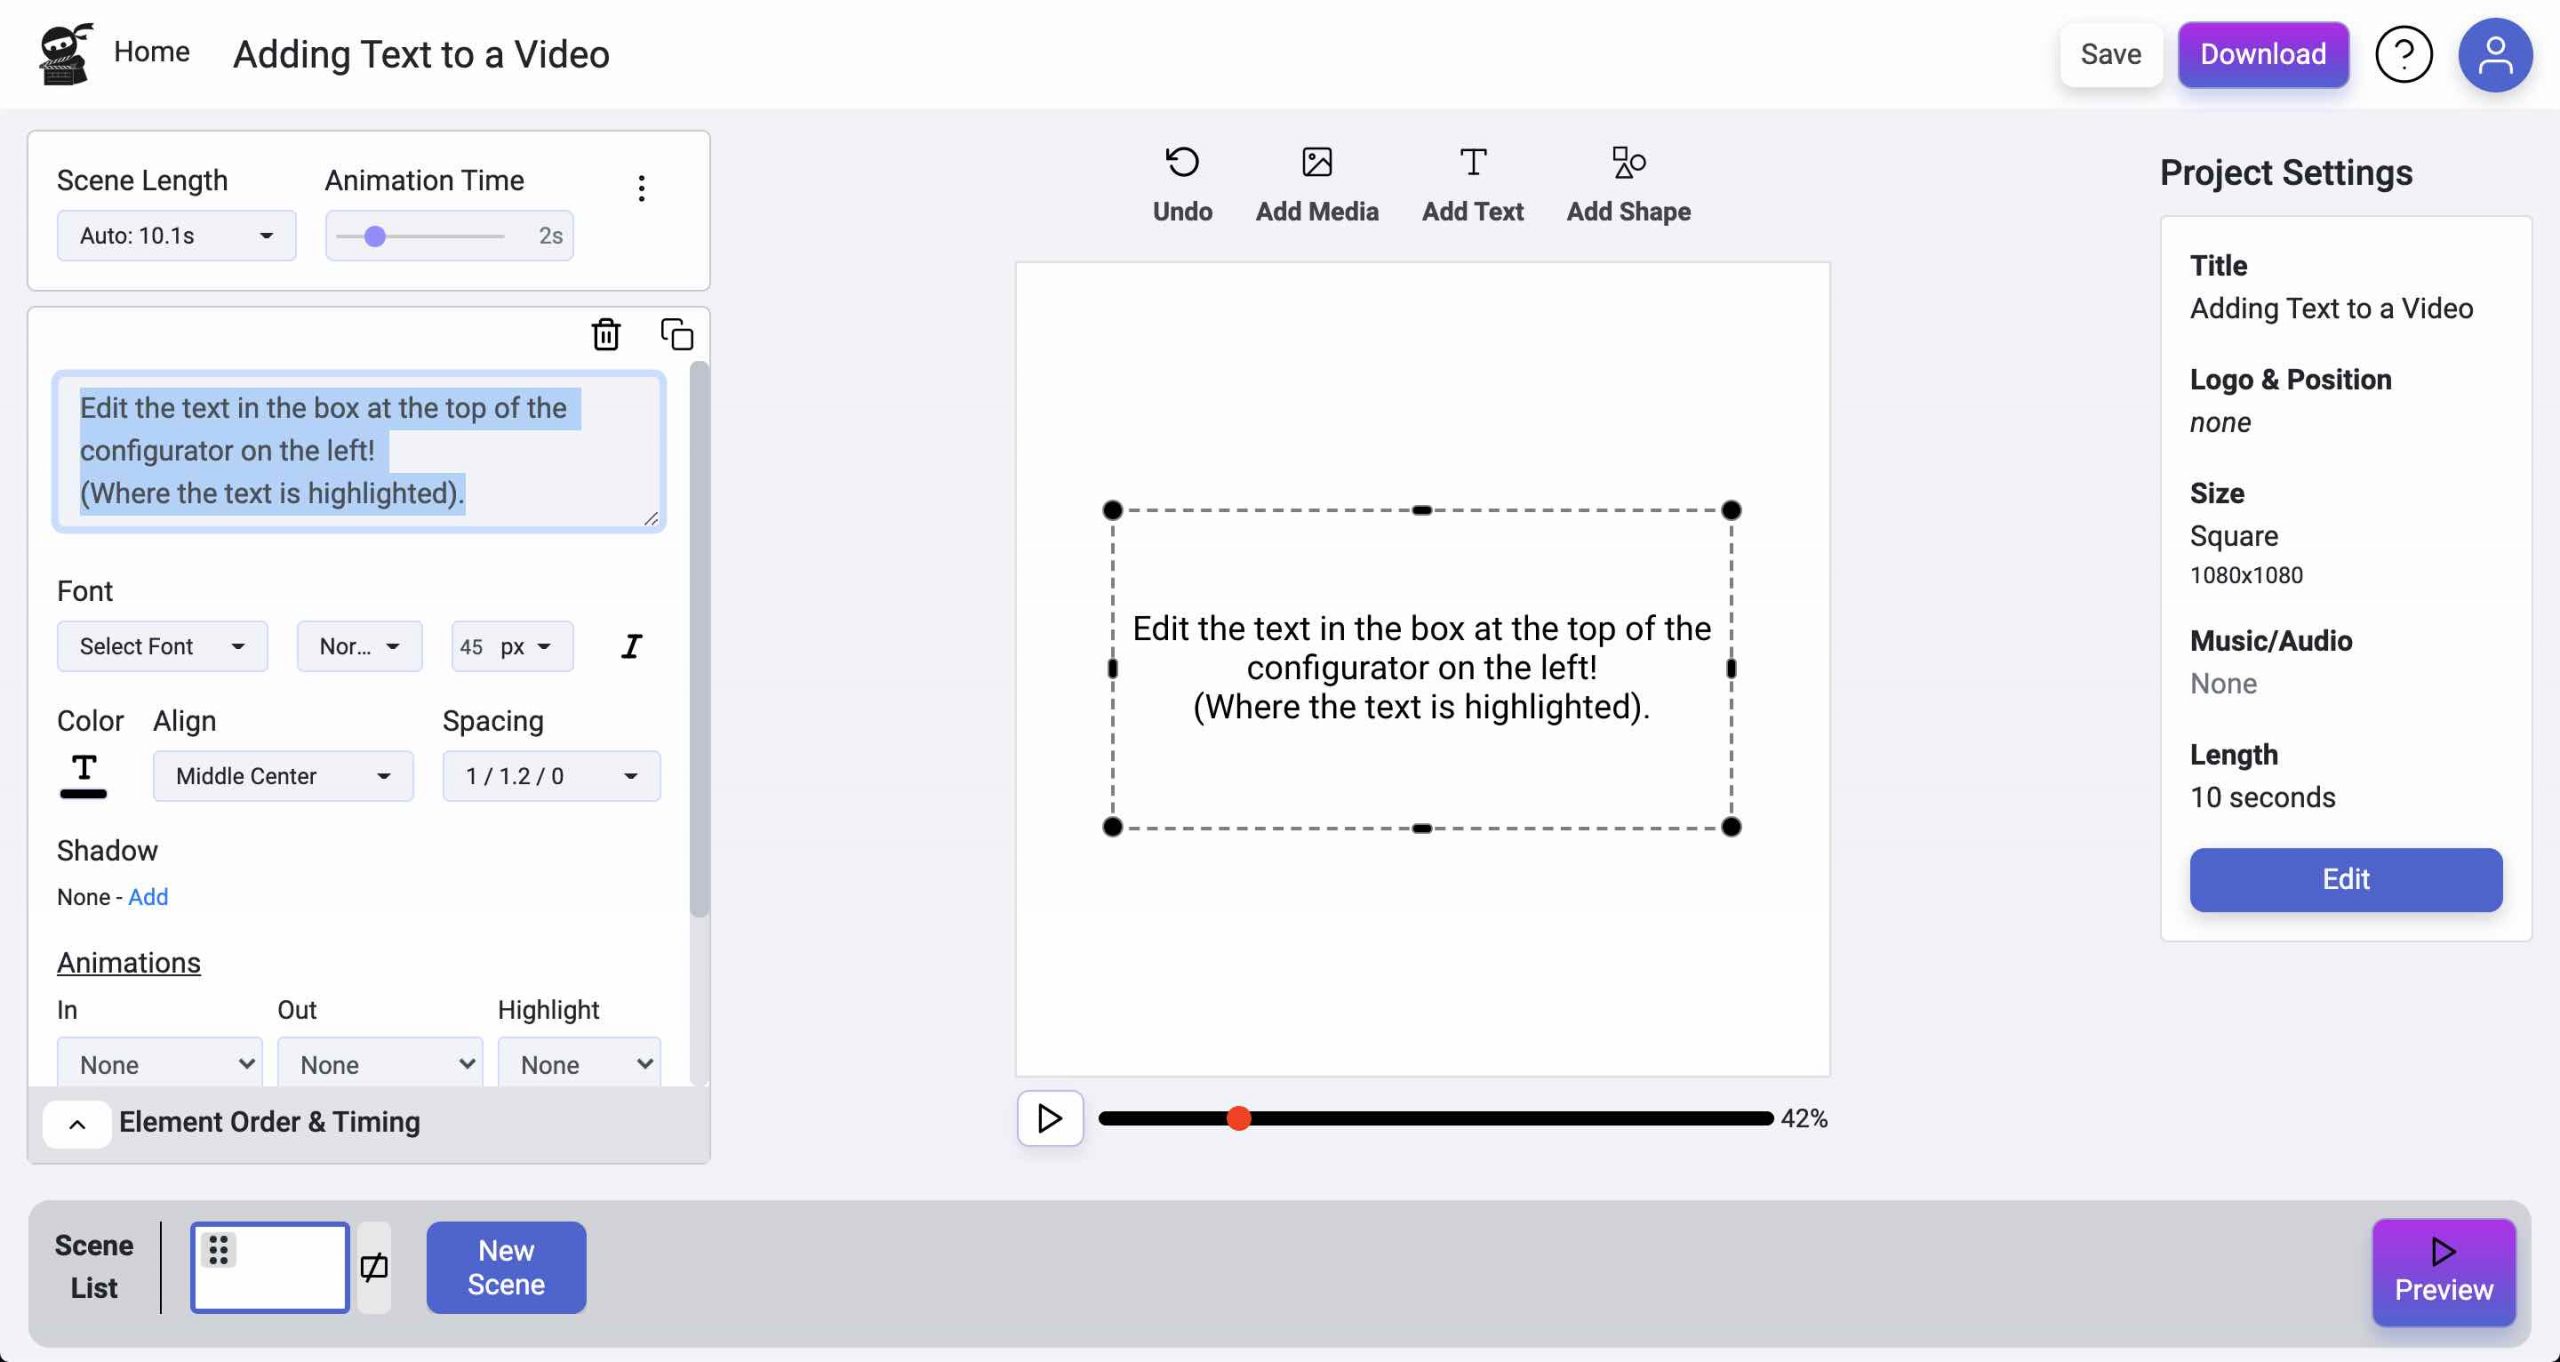
Once you add the Text element, you can type or copy in the text you want to display, simply input it in the box at the top of the configurator on the left.
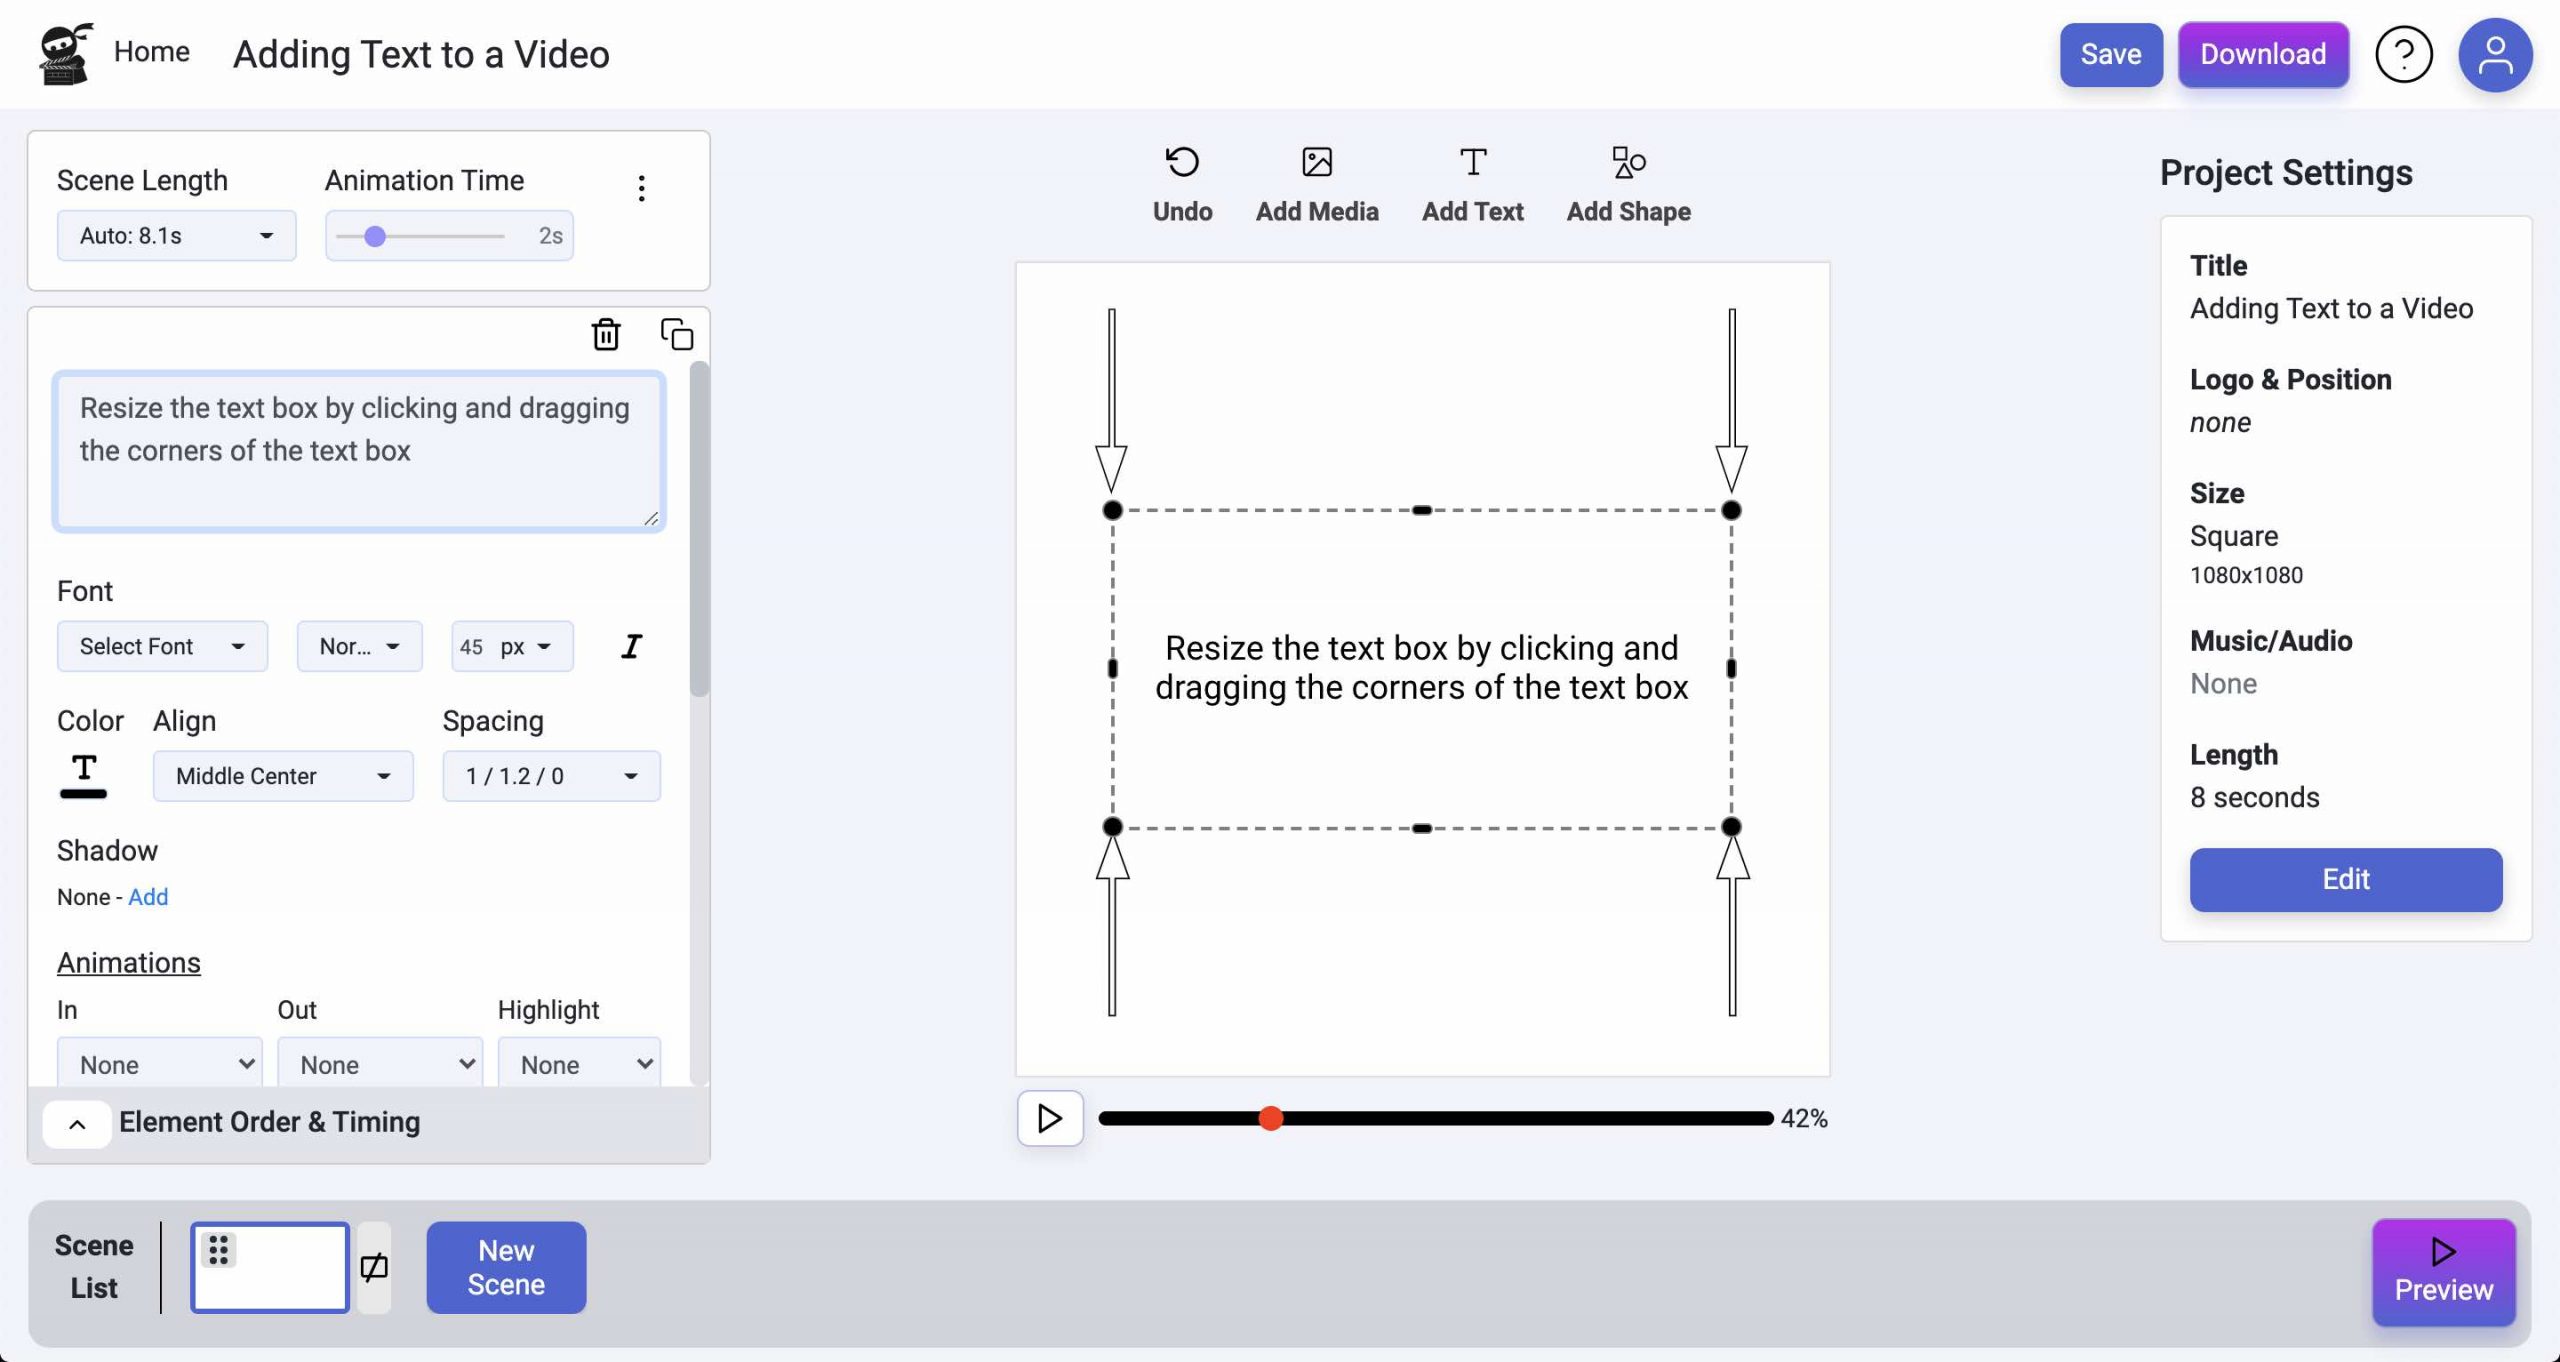
You can click and drag your text element to position it wherever you want it in the scene. You can use the circle handles to resize as well. As you move and resize, it will snap to the sides of the video (or other elements in your scene), and you’ll see a red line showing what it’s snapping to.
With your text element selected, you’ll see the most common style options at the top. Click on the font name to change the font, use the Size dropdown to change the font size, and click the “T” with color block to open the color selector to change the color.
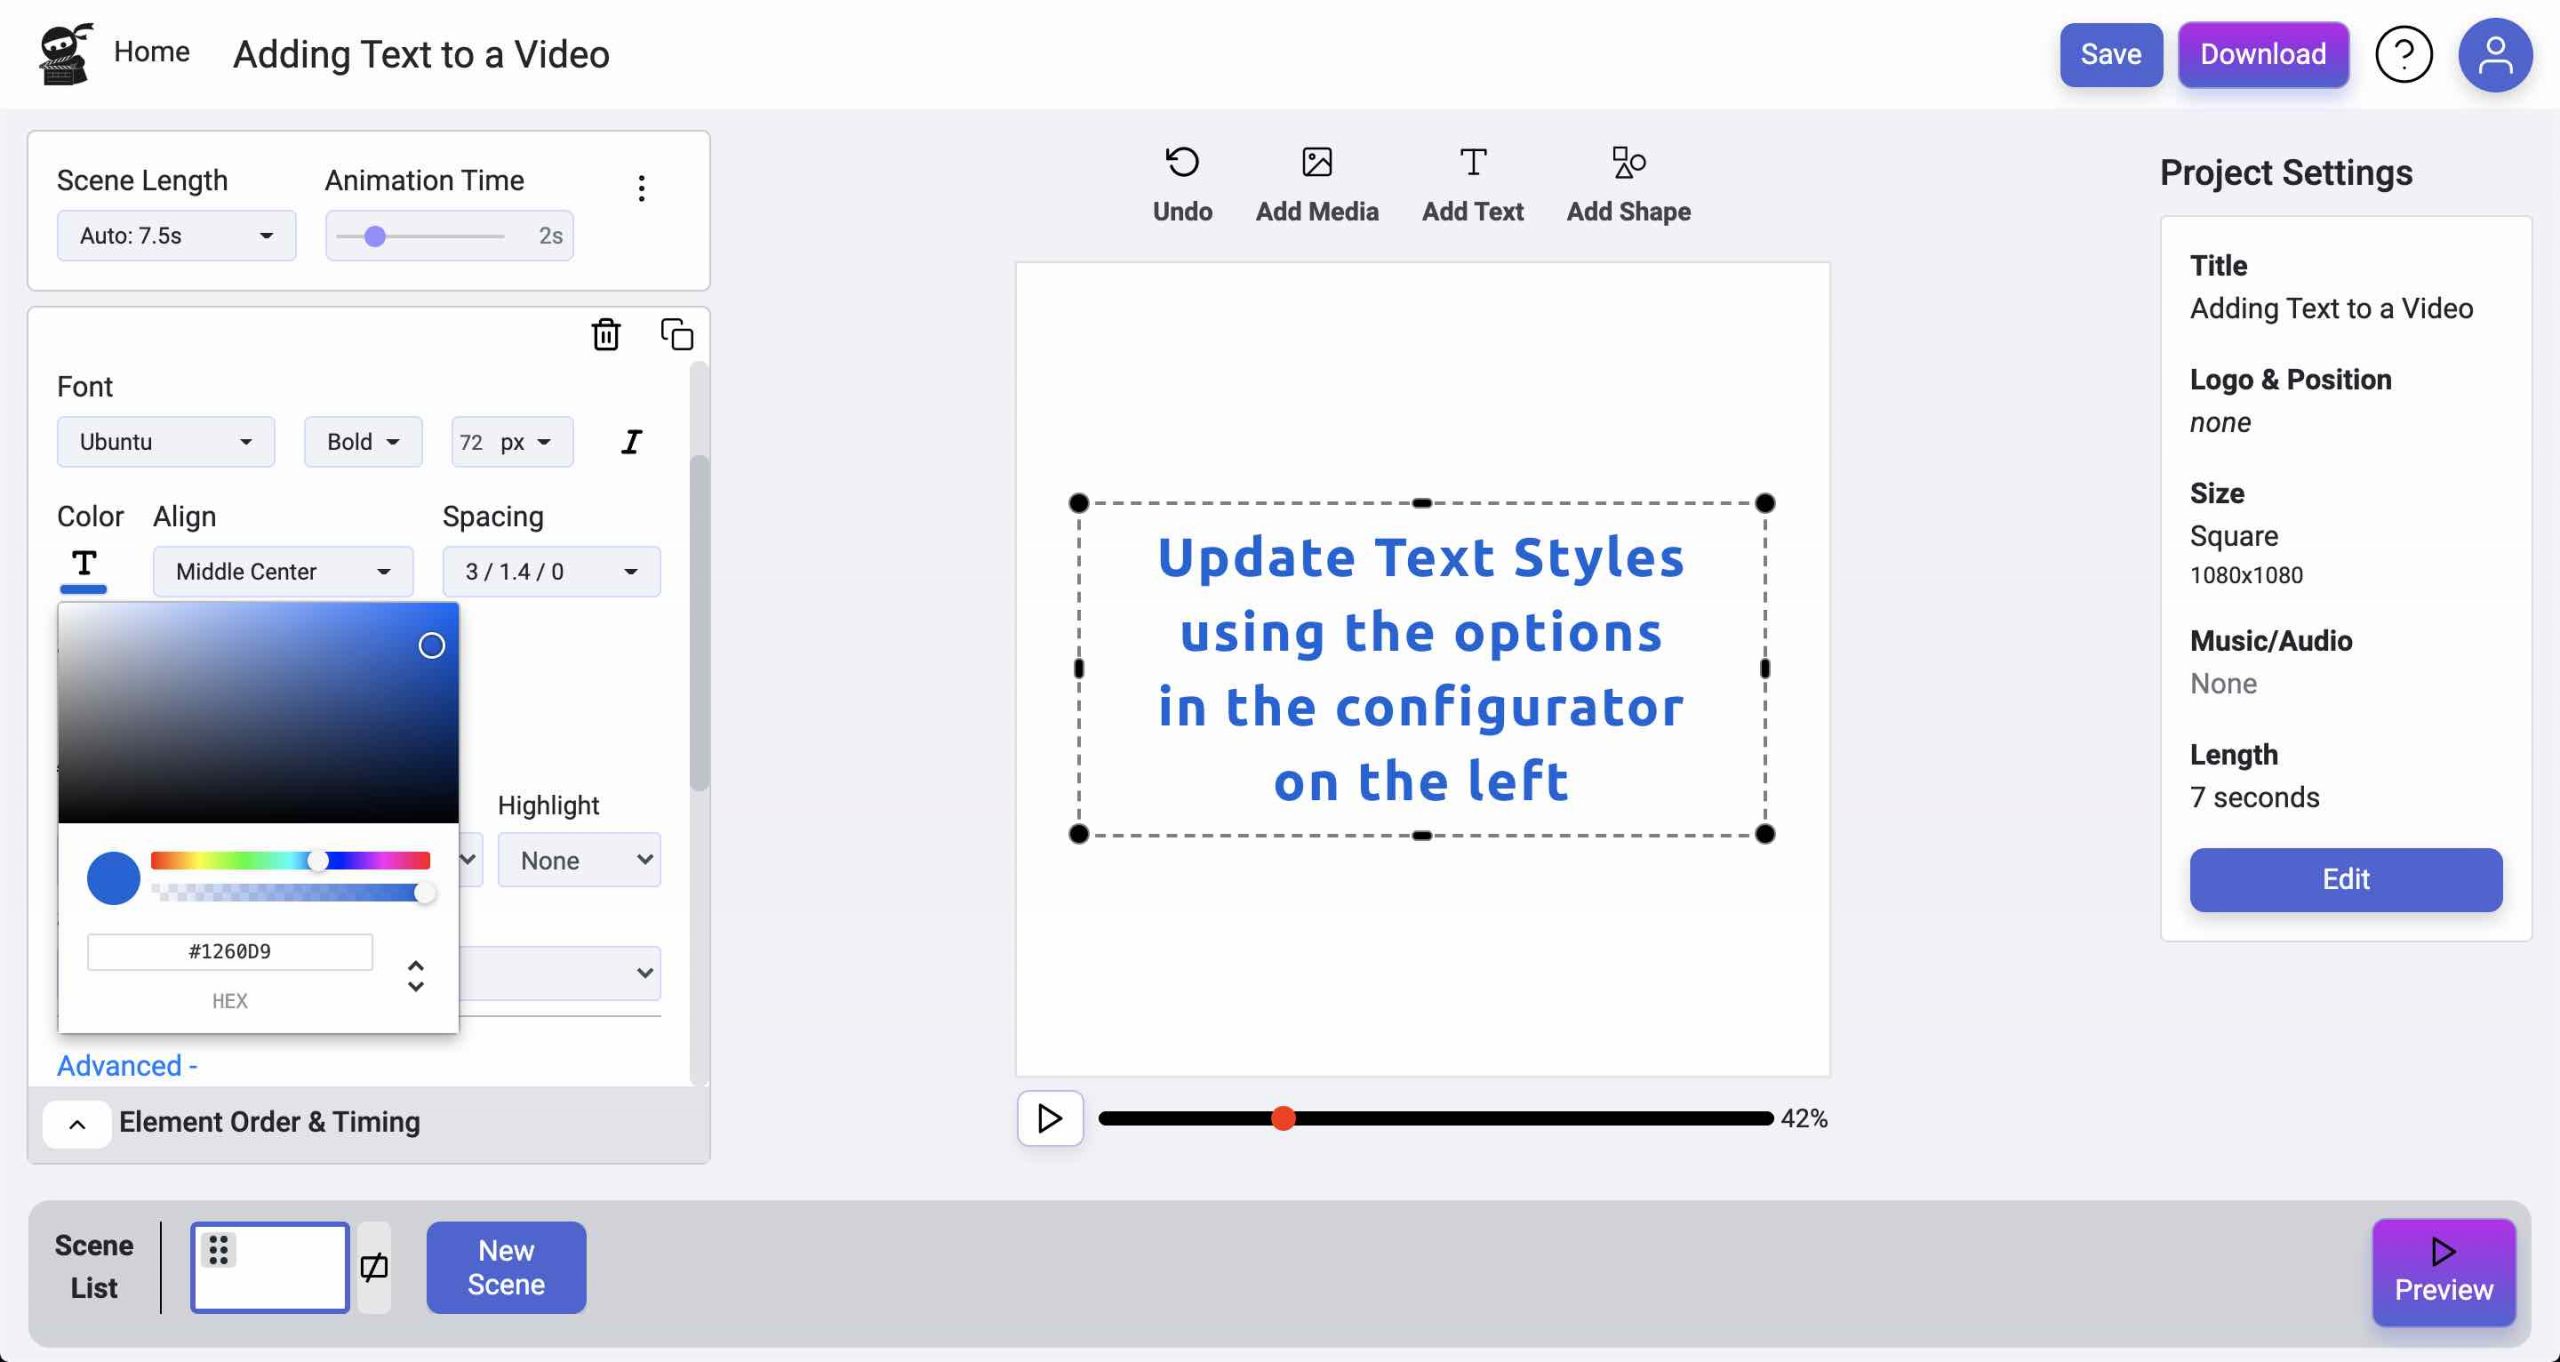
Two things to note: The color picker has a transparency slider at the bottom. If it’s all the way to the left, the text will be invisible. All the way to the right and it will not be transparent at all. The second thing to notice is the “HEX value” – the box with the #0045FF in the image above. This is a short code you can copy and paste to other elements to reuse the same color.
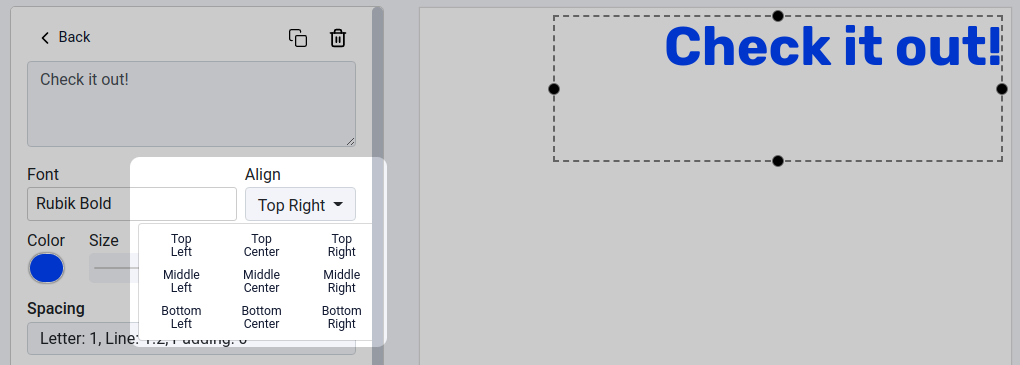
Depending on where your text is in the scene, you may want it aligned to the left, center, or right, as well as the top, middle, or bottom. You can simply click the Align button and select the new position. Also see “Padding” below to add some space.
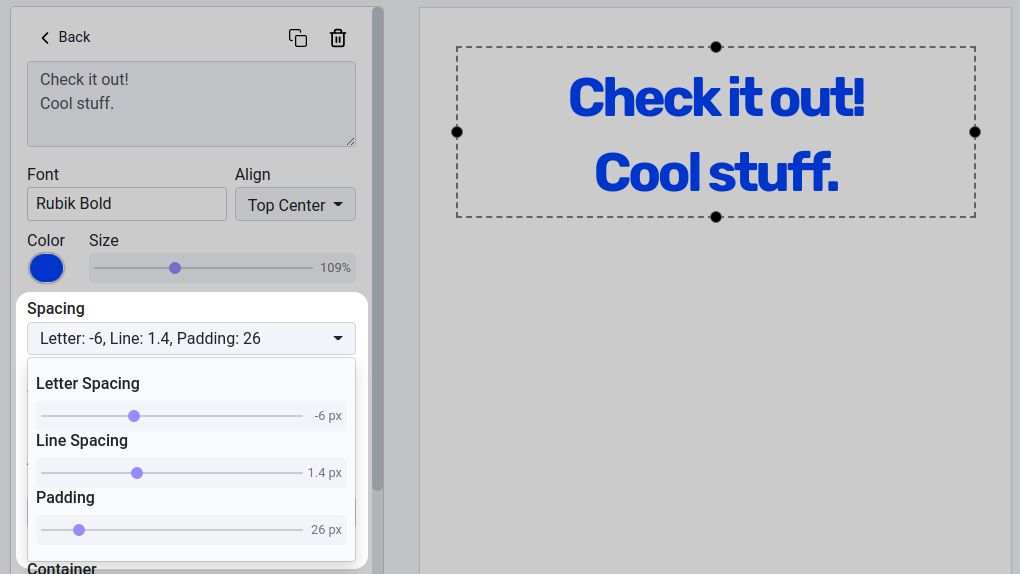
You can also experiment with spacing to add additional style to your text.
Letter: Add or remove space between each letter in your text. Below, set to -6px, it has a nice compact look, while sliding it greater than 1 pixel will give the text a bold, spread-out look.
Line: Just like the letter spacing, you can increase or decrease the space between each line by dragging the Line Spacing slider.
Padding (Border): You can add space between the element outline and where the text starts with the Padding slider. This makes it easy to drag text elements to the corners and sides of the video, then space the text away from the edge.
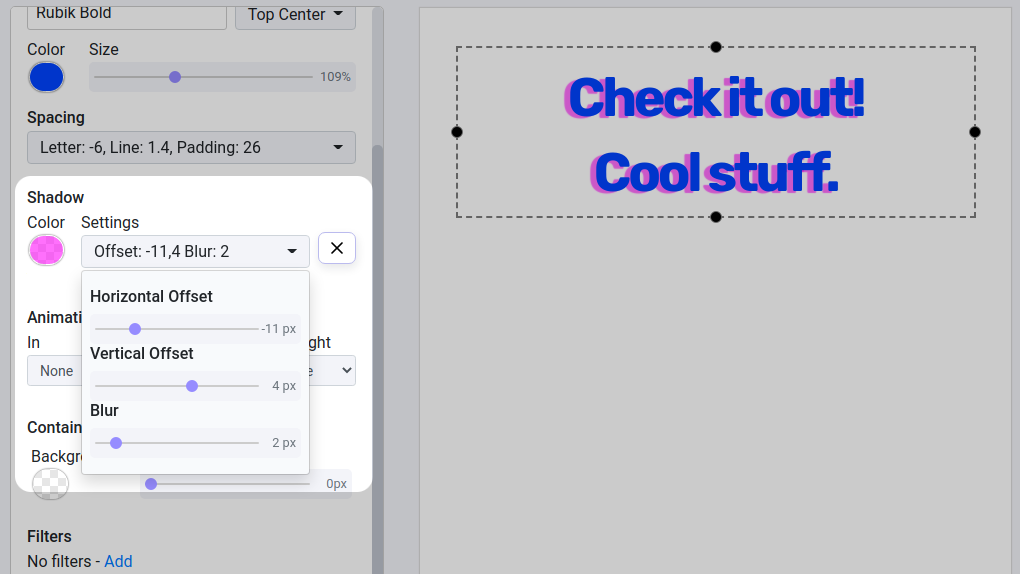
Shadows are useful to stylize your text and help it stand out from the background. By default, you’ll see “No Shadow – Add”. Click the add button to add and customize the shadow. Choose a color (including transparency, if you’d like less of a shadow).
Use the Horizontal Offset slider to move the shadow left or right and the Vertical Offset to move it up or down. The Blur slider is used to adjust between a sharp, solid shadow or a soft, diffused shadow.
To remove the shadow, select the “X” button to the right of the Settings dropdown.
The point of video is movement, and we provide a number of animations you can apply to your text. Below the Animations header, you’ll see 3 dropdowns: In (how the text moves into the scene), Out (how it leaves the scene), and Highlight (an animation to bring attention to the element in the middle).
There are so many animations, we won’t explain each one here. They animate based on position (left, right, up or down), fade the text in, or scale it up or down. We also have some “Bounce” animations for a more fun and friendly movement.
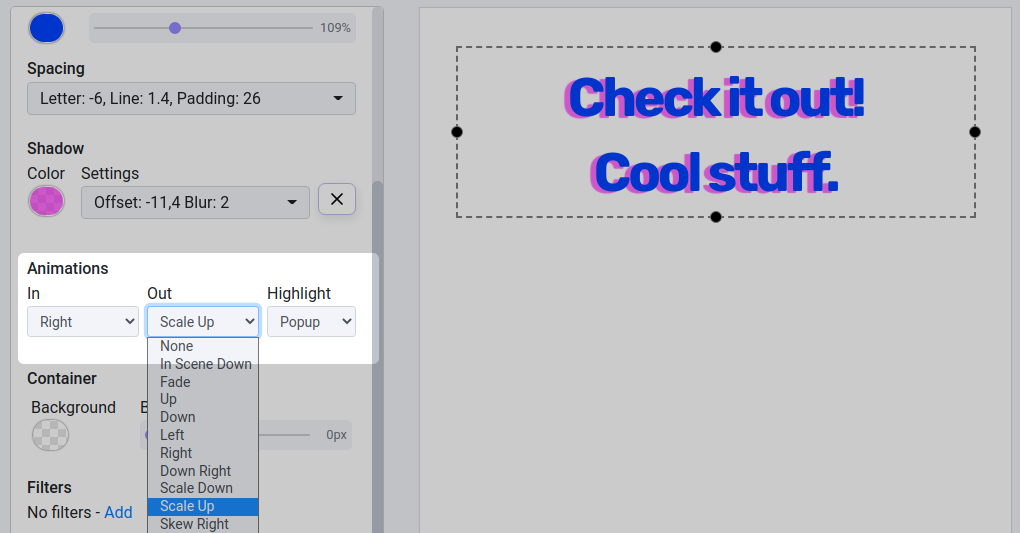
They usually look great in any scene layout, but you can experiment by selecting an animation and pressing the play button to watch and find the perfect animation for your scene.
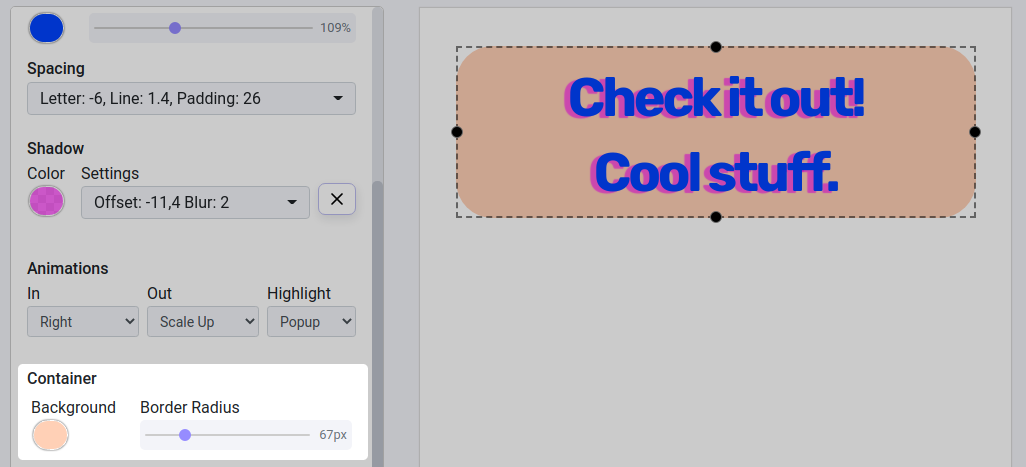
You can add a background color to your text element by selecting the color circle and choosing the color you like. You can also adjust the transparency slider to allow it to blend into the background.
You can also add rounded corners using the “Border Radius” slider.
If you don’t need the text element anymore, you can click the trash icon at the top to delete it.
Alternatively, you might want to use similar text and styles for another element. You can click the duplicate (2 squares icon) at the top to create a new text element with the same settings.

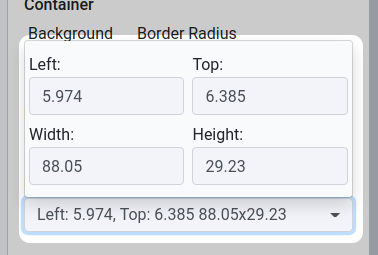
In most cases, you can just drag your text wherever you want. With the help of snapping, it will likely be in the right place for you. But you can also use the Position dropdown at the bottom to enter an exact location.
The locations are percentages, so 0% is at the left/top, and a width or height of 50% is half of the width or height.
When your text overlaps with other elements, you may need to change it so it is displayed above or below other elements.
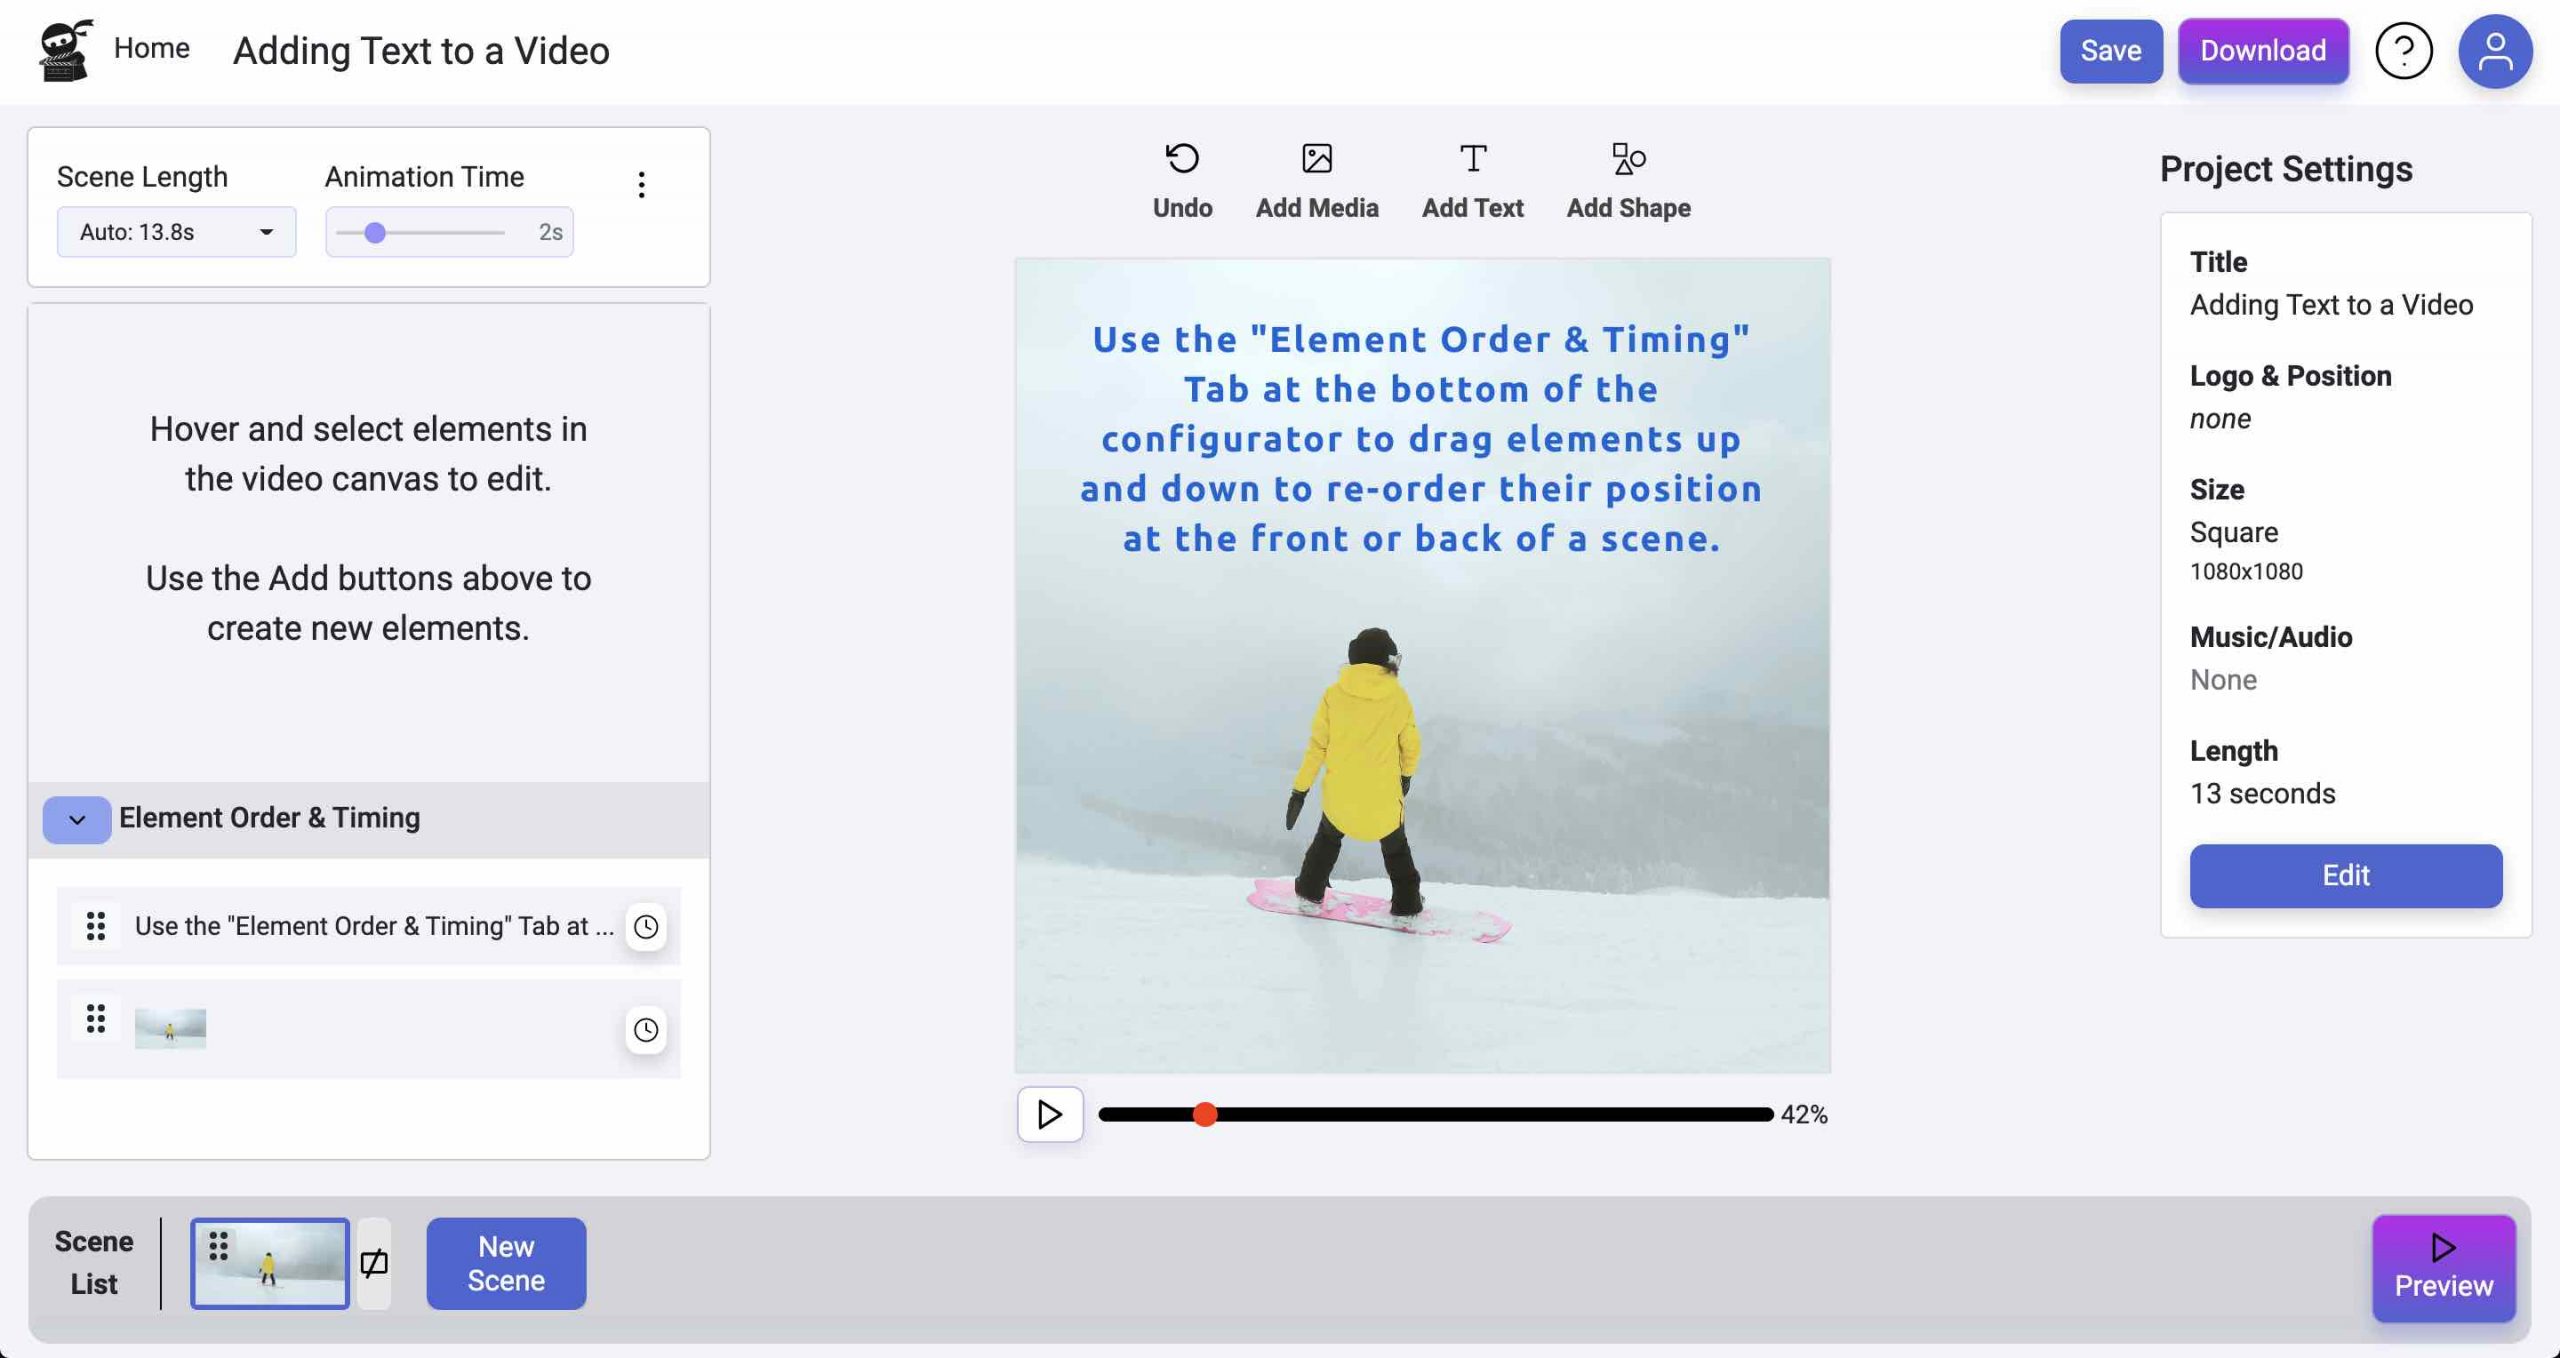
You can do this within the “Element Order & Timing” Tab at the bottom of the configurator, simply expand this section by clicking the arrow.
Here, you’ll see a list of the elements within the scene. To move an element, you can click the drag icon (6 dots) and drag it to the up or down the list.
Elements at the top show at the front of the scene, elements at the bottom are shown at the back of the scene.
This should cover most of the configuration tools available to you with text elements. We’re excited to give you the tools to bring your visions to life!
Still having trouble? Here are some common problems and fixes.
There are a few possible reasons for this:
This is usually because of the transparency slider. See Styling the Text above to make sure it’s not transparent.
This is a common problem in design. Here are a few options to help it stand out:
You can use the duplicate button at the top of the element to make a copy with the same styles.
You can use the delete button (trash icon) at the top of the element to remove it from the scene.
We love helping creators! If this didn’t answer a question you have about how to add text to a video, then feel free to get in touch, or just give us your feedback!

How to Create an Animated GIF Thumbnail Introduction I received a great email from my friend, Rufus the other day. He makes a YouTube series
How to Add Scene Transitions Adding scene transitions to your videos is a piece of cake with Vidds, simply follow the steps below to find
How To Animate Text in Videos How to Animate Text in Videos with Vidds Animating text in Videos is one of the most common reasons
| Cookie | Duration | Description |
|---|---|---|
| cookielawinfo-checbox-analytics | 11 months | This cookie is set by GDPR Cookie Consent plugin. The cookie is used to store the user consent for the cookies in the category "Analytics". |
| cookielawinfo-checbox-functional | 11 months | The cookie is set by GDPR cookie consent to record the user consent for the cookies in the category "Functional". |
| cookielawinfo-checbox-others | 11 months | This cookie is set by GDPR Cookie Consent plugin. The cookie is used to store the user consent for the cookies in the category "Other. |
| cookielawinfo-checkbox-necessary | 11 months | This cookie is set by GDPR Cookie Consent plugin. The cookies is used to store the user consent for the cookies in the category "Necessary". |
| cookielawinfo-checkbox-performance | 11 months | This cookie is set by GDPR Cookie Consent plugin. The cookie is used to store the user consent for the cookies in the category "Performance". |
| viewed_cookie_policy | 11 months | The cookie is set by the GDPR Cookie Consent plugin and is used to store whether or not user has consented to the use of cookies. It does not store any personal data. |